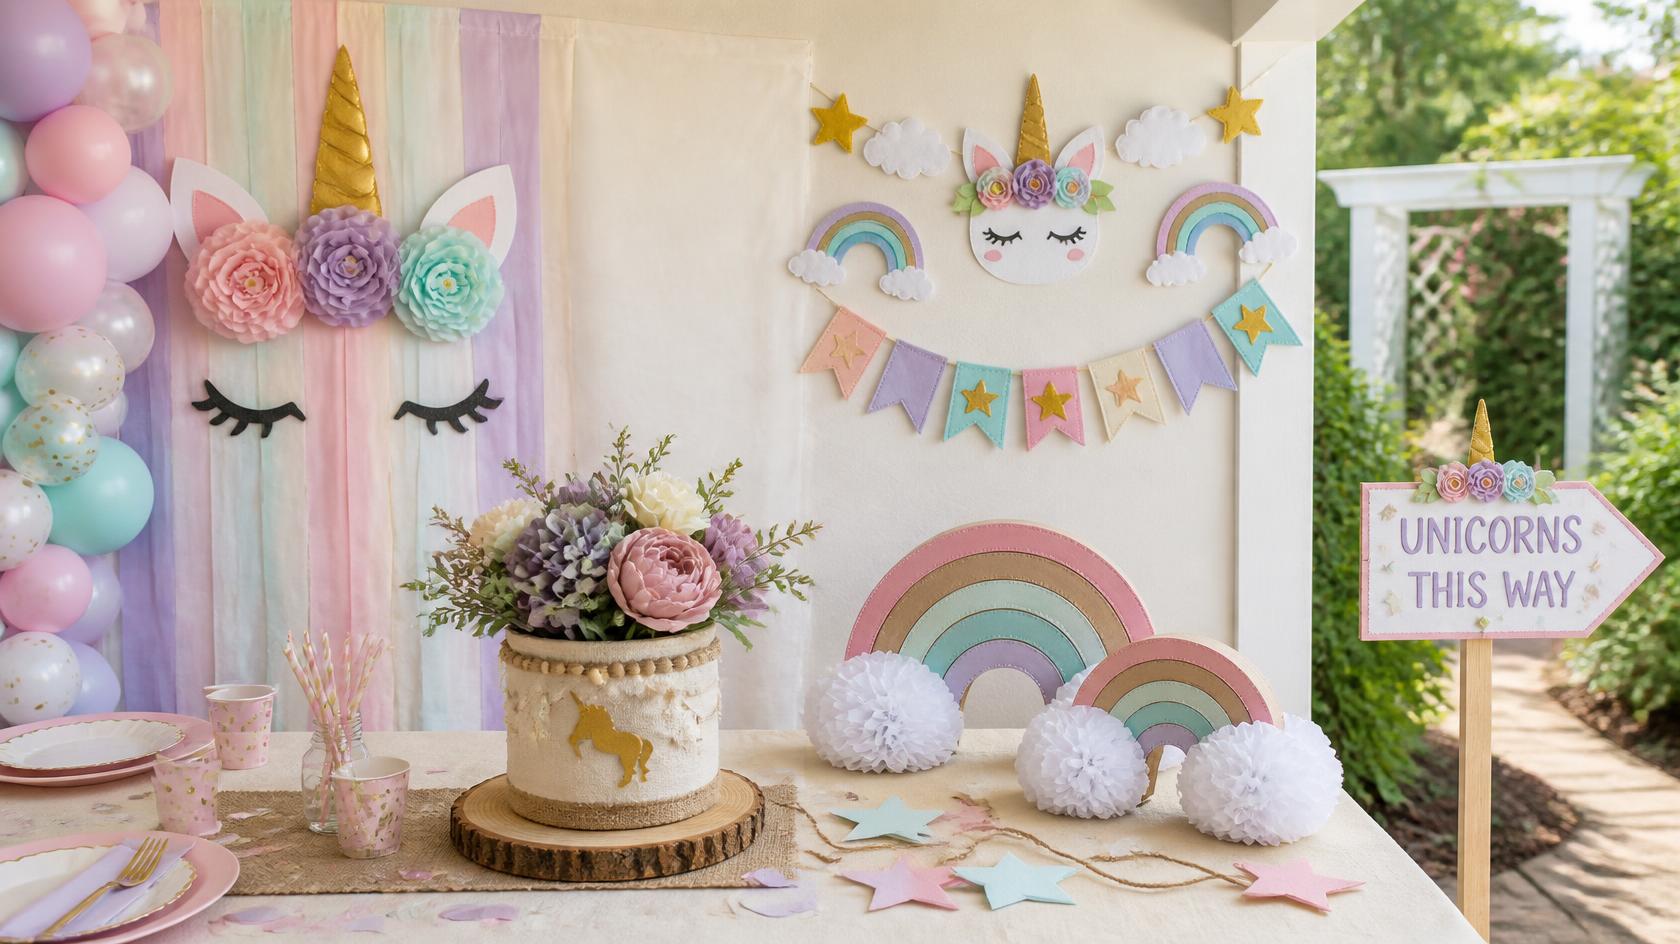
Creating a beautiful unicorn birthday party can become expensive when you purchase every backdrop, centerpiece, banner, and party sign separately. The good news is that you do not have to buy everything to create a coordinated celebration.
By combining affordable craft supplies, reusable materials you may already have at home, and a few carefully chosen party products, you can create unicorn decorations that feel colorful, polished, and thoughtfully planned.
In this guide, you’ll find five easy decorating projects inspired by different unicorn party styles: dollar-store unicorn décor, soft boho or neutral decorations, eco-friendly recycled crafts, no-sew fabric décor, and outdoor unicorn garden decorations.
You can create all five projects for a complete party setup or choose the ideas that work best for your budget, party location, available time, and decorating style.
This post may contain affiliate links. If you purchase through one of these links, I may earn a small commission at no additional cost to you.
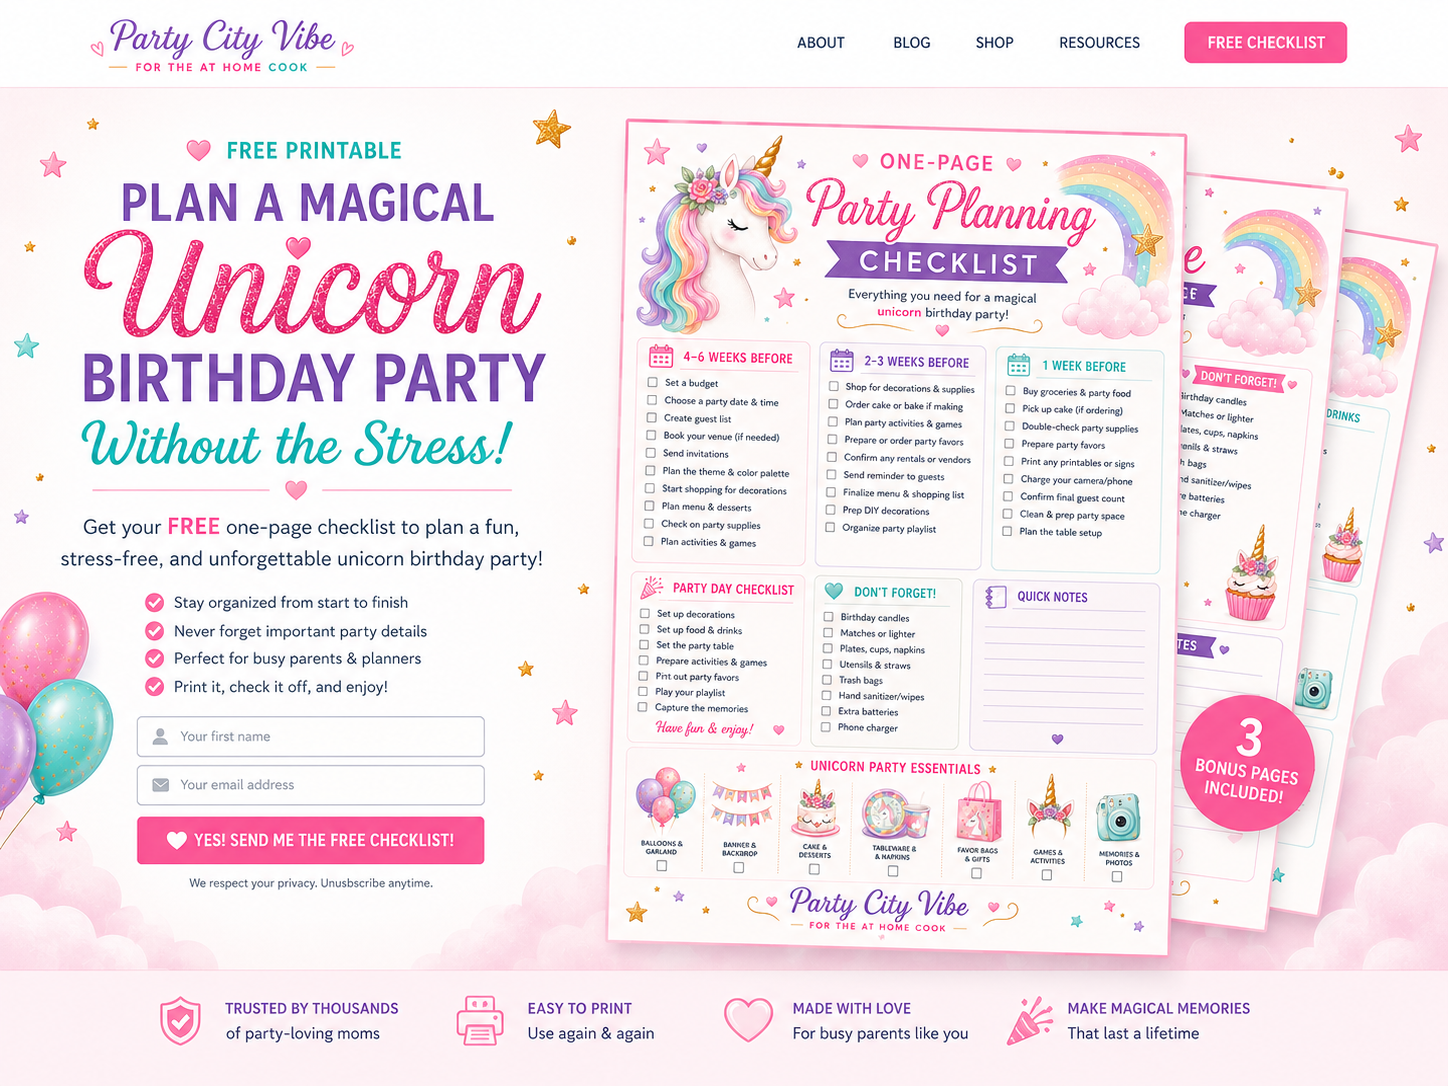
Planning More Than the Decorations?
Decorations are only one part of putting the party together. Download the free Unicorn Birthday Party Planning Checklist to organize your guest list, budget, food, activities, decorations, favors, and party-day details.
Download the Free Unicorn Party ChecklistOpens in a new window.
Choose Your Unicorn Decorating Style
A unicorn birthday party does not have to follow the traditional combination of bright pink, purple, and rainbow colors. You can create a unicorn theme that feels playful, modern, natural, budget-friendly, or perfect for an outdoor celebration.
Decide how you want the finished party to look and feel before buying supplies. Choosing one decorating style will make it easier to select colors, materials, table decorations, and finishing details that complement each other well.
Here are the five unicorn decorating styles featured in this guide:
| Style | Colors and Materials | Best For |
|---|---|---|
| Dollar-Store Unicorn | Pastel pink, lavender, blue and gold | Parents who want a magical look while working with a strict budget |
| Boho Unicorn | Cream, blush, beige, muted lavender and dusty rose | A soft, modern celebration with a more understated color palette |
| Eco-Friendly Unicorn | Cardboard, paper, natural fibers and reusable materials | Families who want to reduce disposable plastic and reuse household materials |
| No-Sew Unicorn | Felt, ribbon, fabric and hot glue | Easy fabric decorations that do not require sewing experience |
| Unicorn Garden | Pastels, flowers, greenery and weather-resistant signs | Backyard birthdays, garden parties and other outdoor celebrations |

Avoid trying to select every detail from a single style. A boho unicorn party could include recycled cardboard decorations, while an outdoor unicorn garden could use a no-sew felt banner. The key is to select one main color palette and repeat those colors throughout the party so everything feels coordinated.
Once you have chosen your style, gather only the supplies needed for the projects you plan to complete. This will help you stay within your budget and avoid buying craft materials that you may not use.
Shop the Supplies
Build your decorating kit with pastel craft paper, muted boho paper, biodegradable glitter, felt sheets, artificial flowers and gold ribbon. Choose colors that match your party palette so the finished projects look like they belong together.
Basic Supplies to Keep on Hand
You do not need to purchase every item on this list before you begin. The supplies you need will depend on which unicorn decorations you decide to make and what materials you already have at home.
Start by choosing your projects, reviewing the instructions for each one, and then making a shopping list. Cardboard boxes, leftover ribbon, tissue paper, jars, and other reusable materials may already be available around your home. Using what you have first can help keep the total decorating cost under control.
General Supply List
Depending on your selected projects, you may need:
Before purchasing anything: Separate the list into three categories—supplies you already own, supplies you can reuse and supplies you still need to buy. This simple step can prevent duplicate purchases and make it easier to stay within your decorating budget.
A Quick Safety Reminder
Only adults should handle hot-glue guns and craft knives. Protect your work surface with a cutting mat, and allow glued or painted decorations to dry completely before children handle them.
Small pieces such as beads, stars, ribbon scraps, glue dots, and decorative accents can present a choking hazard. Keep them away from toddlers and young children unless they are being closely supervised.
Shop Helpful Craft Supplies
Having the right tools can make your DIY unicorn decorations easier to assemble and give each project a cleaner, more polished finish. You do not need to purchase everything at once. Choose the supplies that match the projects you plan to make.
1. Removable Wall Hooks
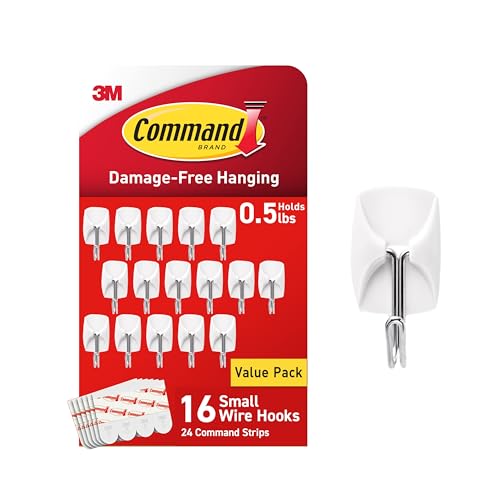

Help hang banners, lightweight backdrops and garlands without placing permanent hardware in the wall.
2. Low-Temperature Glue Gun

Helps secure felt, ribbon, flowers, cardstock and lightweight decorations while reducing the heat compared with a standard glue gun.
3. Craft Scissors

Useful for creating clean edges when cutting paper, cardstock, ribbon, felt, and printable templates.
4. Cutting Mat

Protects your table or countertop when working with a craft knife, ruler, or detailed templates.
5. Pastel Cardstock
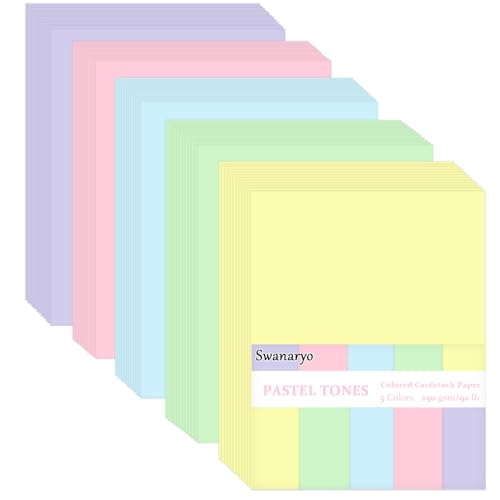
Provides coordinated paper for unicorn horns, ears, flowers, stars, signs, and other decorative accents.
Glue Dots

A convenient option for attaching lightweight decorations without visible liquid glue or drying time.
DIY Project 1: Dollar-Store Unicorn Party Backdrop
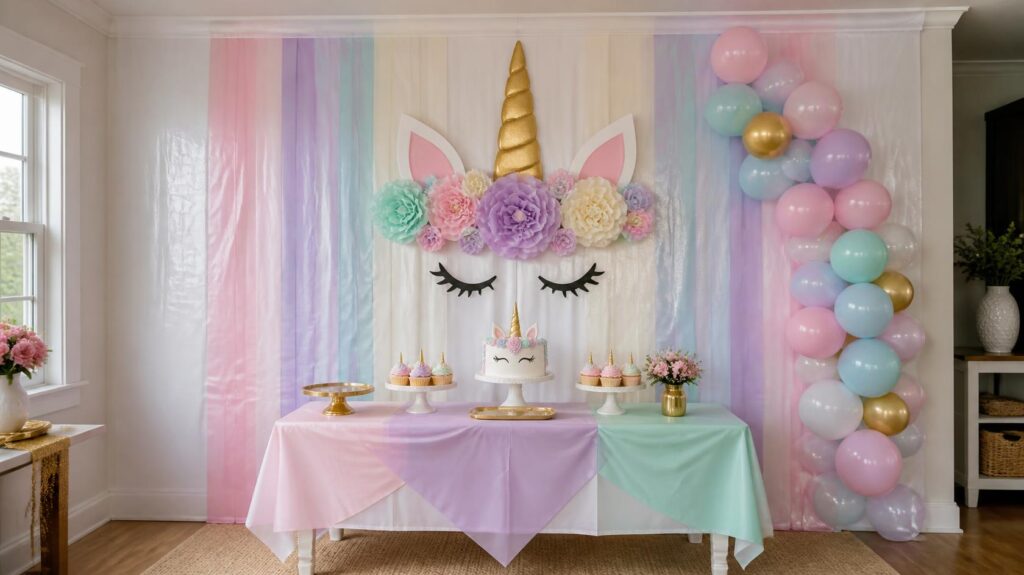
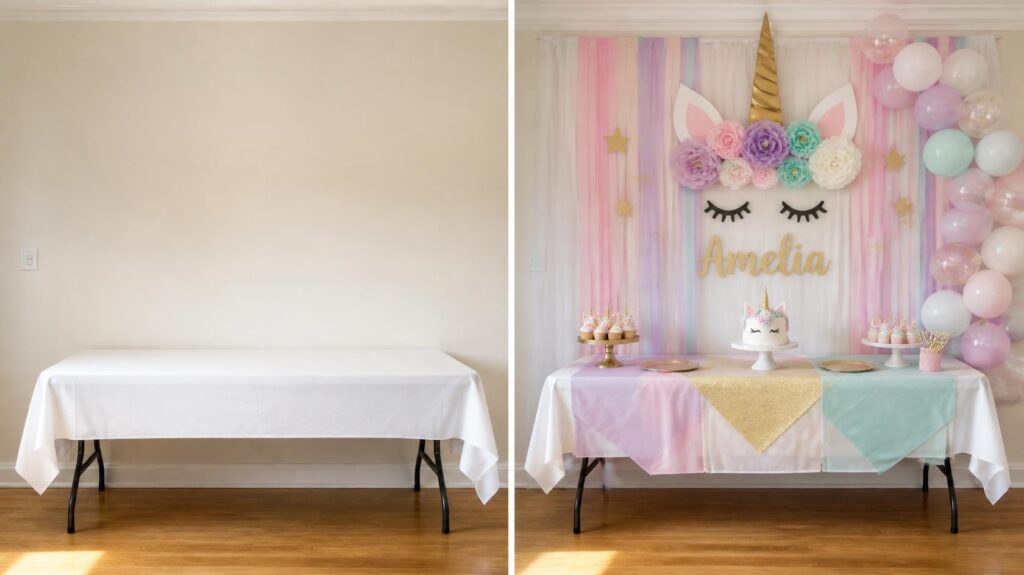
A party backdrop instantly creates a focal point and helps even a simple unicorn celebration feel coordinated. It can be placed behind the cake table, used as a photo area, or positioned near the entrance to welcome guests.
The best part is that you do not need an expensive custom backdrop to get a polished look. Plastic tablecloths, streamers, poster board, tissue paper, and a small balloon cluster can create the same colorful effect for much less.
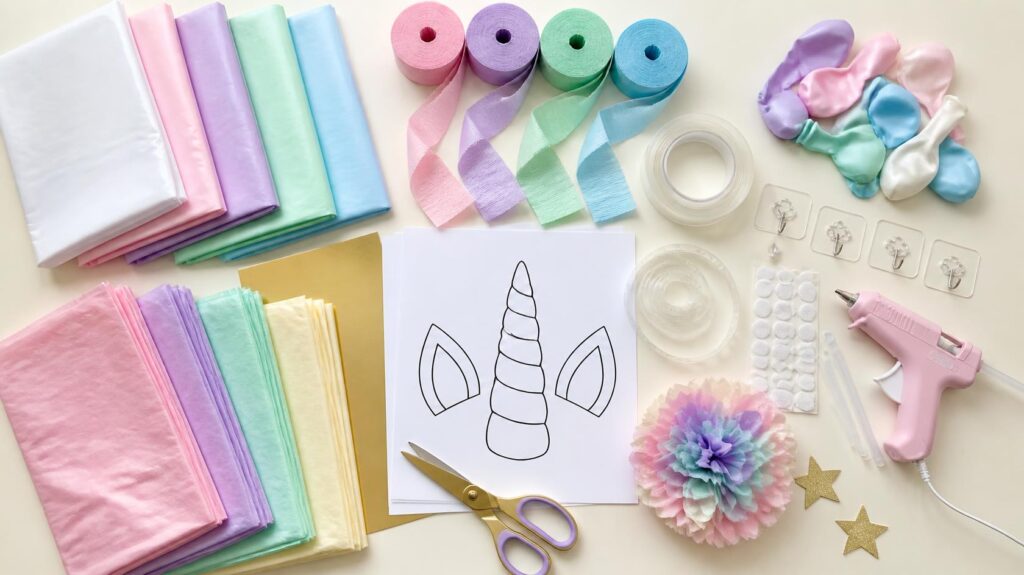
Materials You’ll Need
Before you begin: Choose three main party colors and one metallic accent. Limiting the color palette will make inexpensive supplies look more coordinated.
How to Make Your Unicorn Party Backdrop
Step 1: Create the Backdrop Foundation
Hang a white or pastel plastic tablecloth against the wall. Smooth it out as much as possible and secure the top corners with removable wall hooks or strong tape.
If one tablecloth does not provide enough coverage, overlap two or three tablecloths. Make sure the seams are positioned behind the decorative layers whenever possible.
Step 2: Add Streamers and Pastel Layers
Cut streamers or additional plastic tablecloths into long vertical strips. Layer these strips across the backdrop to add color and movement.
Alternate the colors instead of placing all the pink, purple, or blue pieces together. Allow some strips to overlap so the background looks fuller.
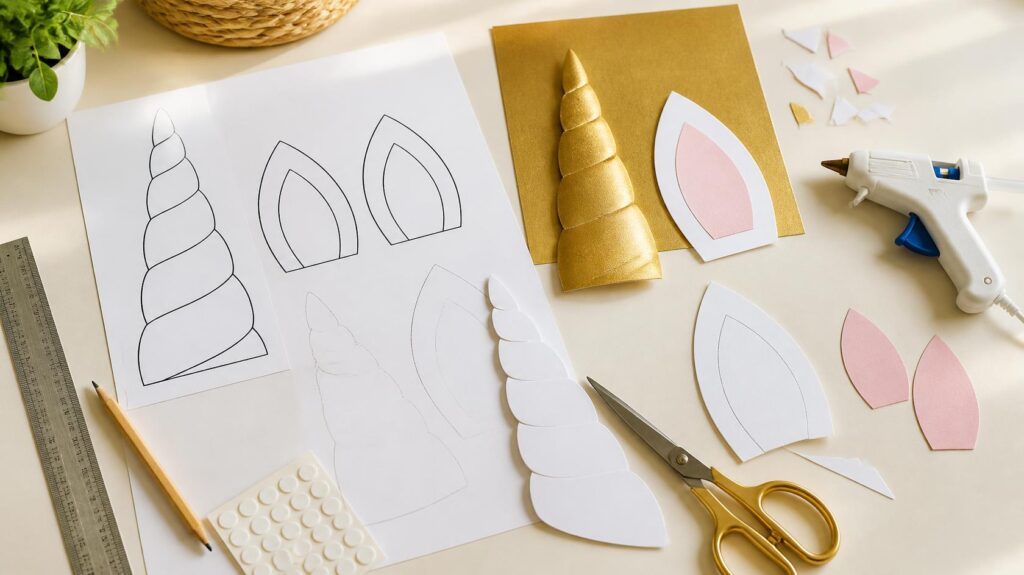
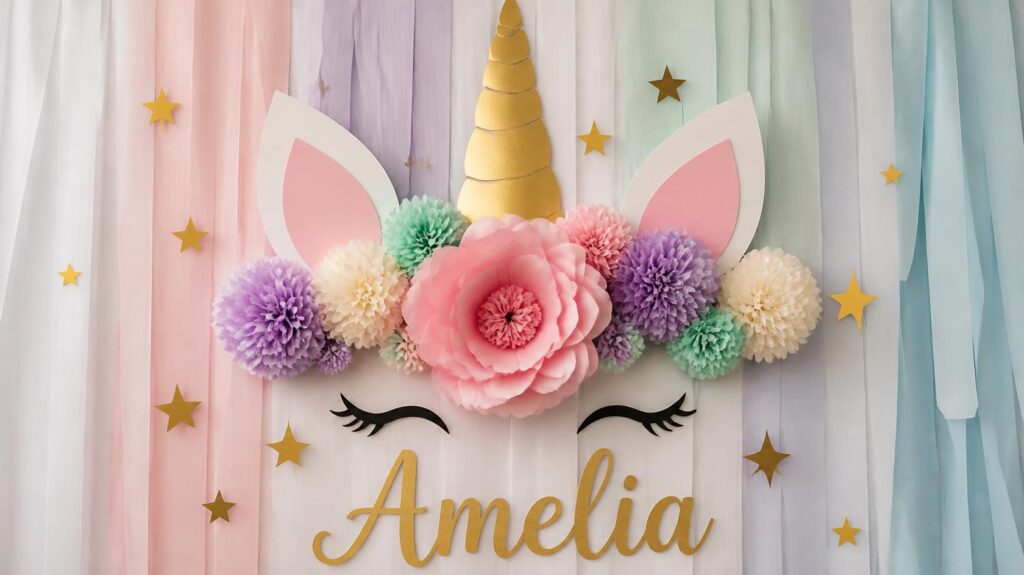
Step 3: Make the Unicorn Horn and Ears
Use printable unicorn templates to trace one large horn and two ears onto poster board. Cut out each piece carefully.
Cover the horn with gold cardstock or gold craft paper. Create white outer ears and add smaller blush, lavender, or gold inner-ear pieces. Layering the pieces will give the ears a more finished appearance.
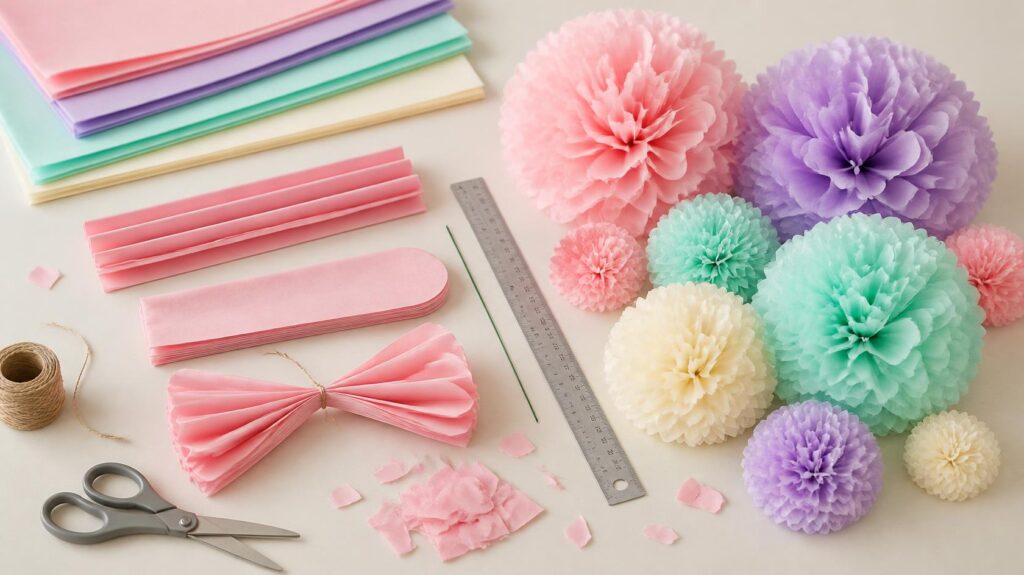
Step 4: Create the Tissue-Paper Flowers
Make several tissue-paper flowers in colors that coordinate with the backdrop. Use a mixture of small, medium, and large flowers to add dimension.
You do not need to make dozens of them. A cluster of three to seven flowers around the base of the horn is usually enough to create a beautiful focal point.
Step 5: Assemble the Unicorn Design
Position the horn near the top center of the backdrop. Place one ear on each side and arrange the tissue-paper flowers around the base of the horn.
Lay everything out before attaching it permanently. Step back several feet to make sure the horn and ears are centered.
Step 6: Add a Balloon Cluster
Use a balloon decorating strip to create a small cluster of pastel balloons. Attach it to one side of the backdrop for an asymmetrical boutique-style look.
A smaller balloon cluster is usually easier to assemble and secure than a full balloon arch. It also allows the unicorn face and party table to remain visible.
Step 7: Add the Finishing Details
Add closed eyelashes, gold stars, the birthday child’s name, or a short phrase such as “Magical Birthday.” Keep the lettering large enough to be seen in photographs.
Once everything is attached, take a picture of the setup with your phone. Viewing the backdrop through the camera can help you spot gaps, uneven decorations, or off-center pieces that are not as noticeable when you are standing close to it.
Ways to Style Your Unicorn Backdrop
For a classic unicorn party, use bright pink, purple, aqua, yellow, and rainbow-colored accents.
For a softer boho look, choose cream, blush, beige, dusty rose, and muted lavender with small touches of gold.
You can also personalize the backdrop by placing the child’s name in the center or adding their age beneath it. Use it behind the cake table for the main party display, or leave the lower area open and turn it into a unicorn photo backdrop for guests.
Quick Decorating Tip
Keep the largest decorations near the center or slightly off-center, and use smaller flowers, stars and balloons to fill the surrounding space. This creates a polished arrangement without making the backdrop feel crowded.
Recreate This Unicorn Backdrop
This look is economical to recreate. Combine a few affordable supplies in the same color palette to build a backdrop that feels coordinated, full, and ready for pictures.
1. Pink Balloons
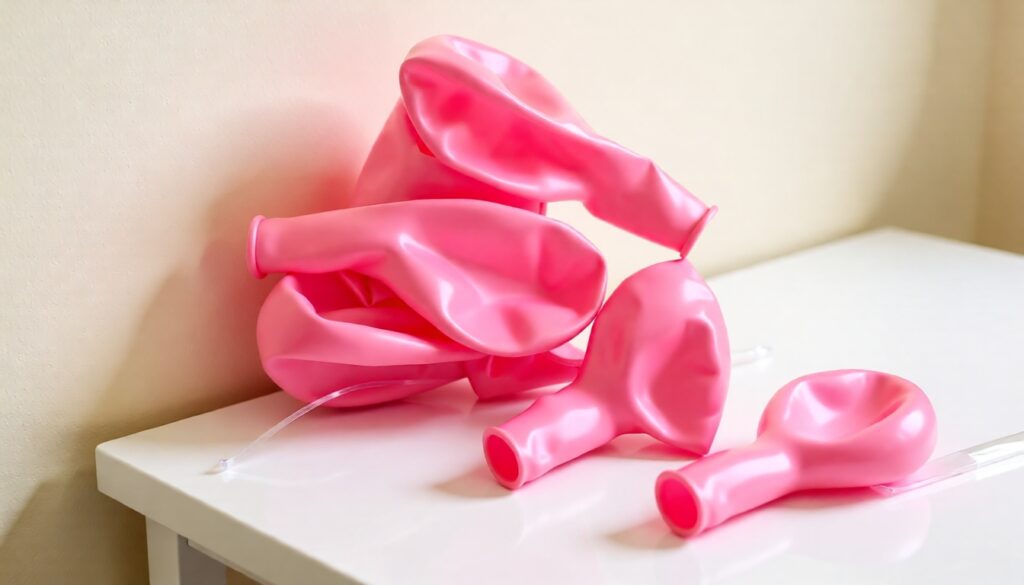
Use a coordinated balloon set to create the small cluster along one side of the backdrop.
2. Disposable Tablecloth
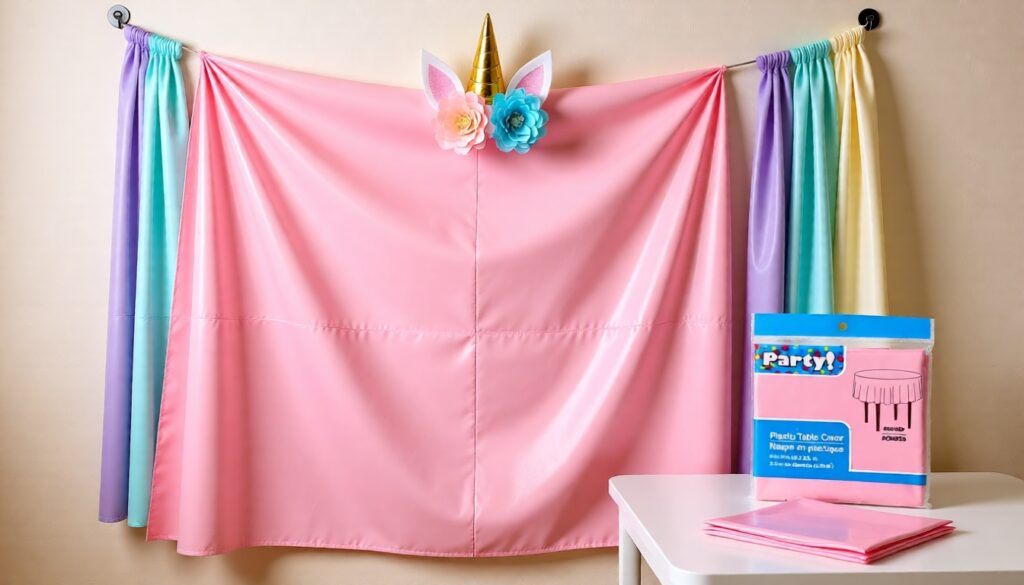
Use the pink tablecloth as the backdrop foundation or cut it into strips for soft, layered pastel accents.
3. Tissue-Paper Pack
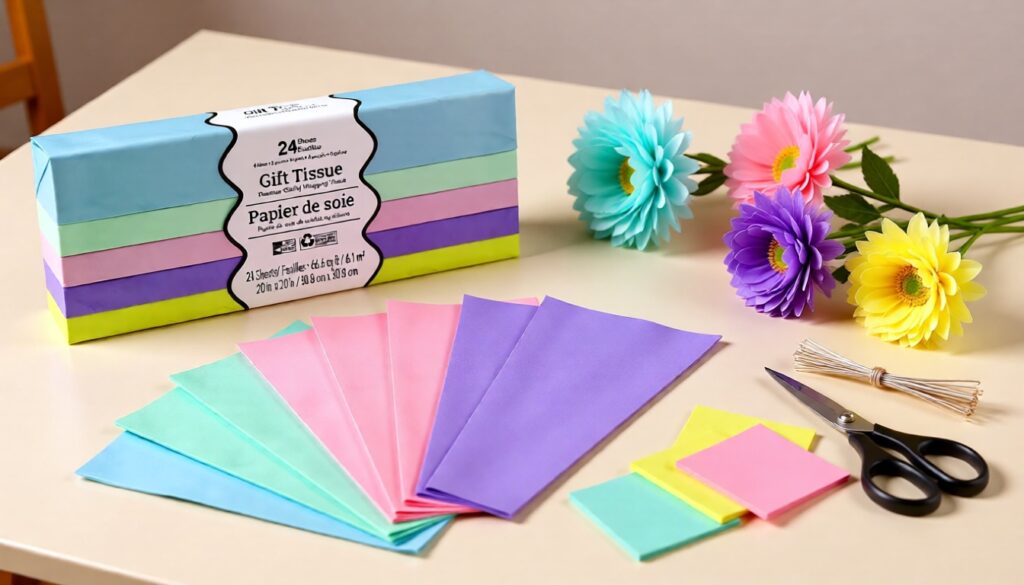
Create layered flowers in different sizes to arrange around the horn and ears.
4. Poster Board
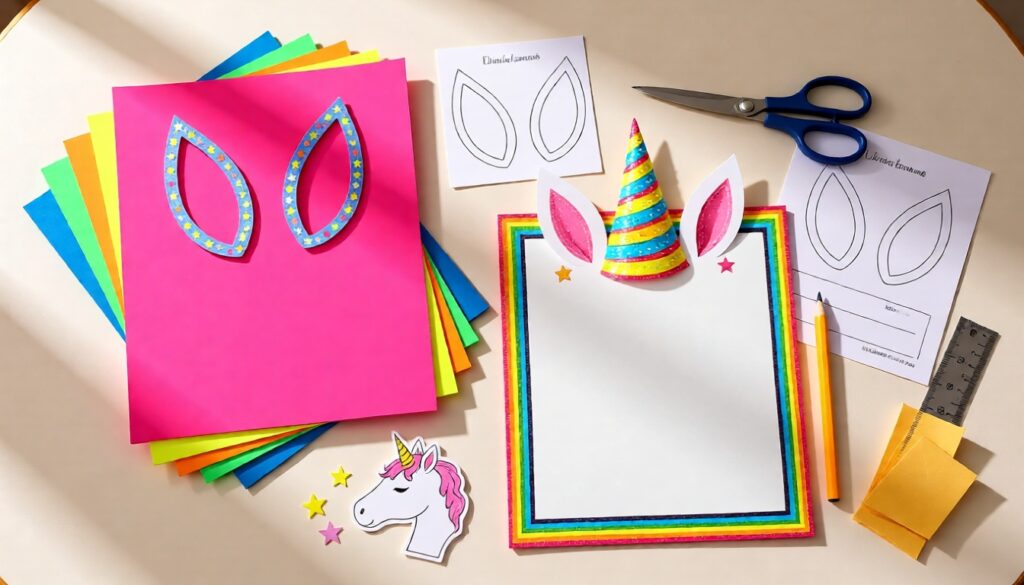
Use the colorful poster board to create the unicorn’s horn, ears, stars, and other decorative backdrop accents.
5. Removable Wall Hooks
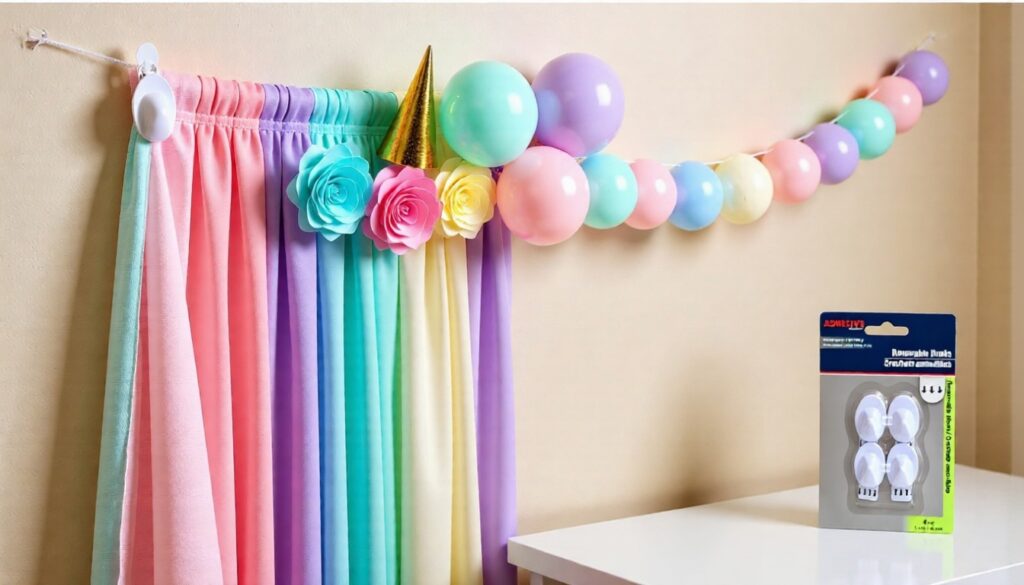
Secure lightweight tablecloths, garlands, balloons, and backdrop pieces without them being permanent.
Unicorn Backdrop Lettering

Personalize the display with the birthday child’s name, age, or a short birthday message.
DIY Project 2: Boho Unicorn Table Centerpiece

A unicorn party does not have to be covered in bright rainbow colors. A boho unicorn centerpiece uses cream, blush, beige, dusty rose, muted lavender, and small touches of gold to create a softer, more modern look.
This project also allows you to reuse something you already have at home. A mason jar, clean food can, small vase, or similar container can become a beautiful table decoration when it is covered and styled with flowers and simple unicorn accents.
How to Make a Boho Unicorn Centerpiece
Step 1: Prepare the Container
Clean the mason jar, can, or vase thoroughly and remove any labels or adhesive. Make sure the container is completely dry before covering or painting it.
If you are using a metal can, check the top edge carefully and cover any sharp areas before continuing.
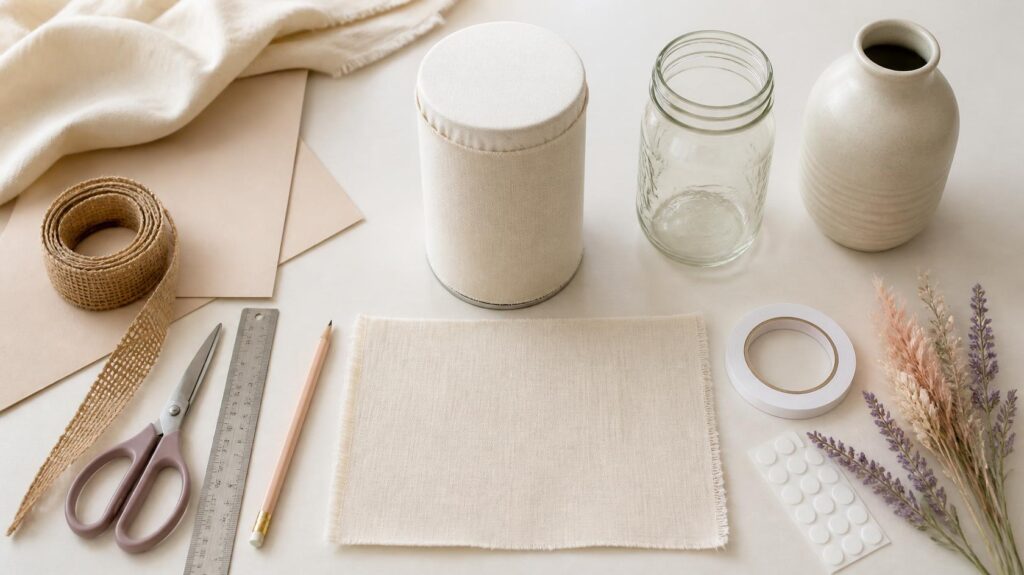
Step 2: Cover the Container
Wrap the container with cream paper, neutral fabric, or jute. Secure the material at the back with double-sided tape or a small amount of hot glue.
Keep the seam facing away from the front of the centerpiece. Smooth the material as you work so the finished container looks neat.
Step 3: Add the Unicorn Detail
Cut a simple unicorn silhouette or horn from cardstock. Cover it with gold craft paper or paint it with muted gold craft paint.
Attach the unicorn detail to the front of the container. You can also add two small ears, closed eyelashes, or a few gold stars, but keep the design simple so it maintains the minimalist boho style.
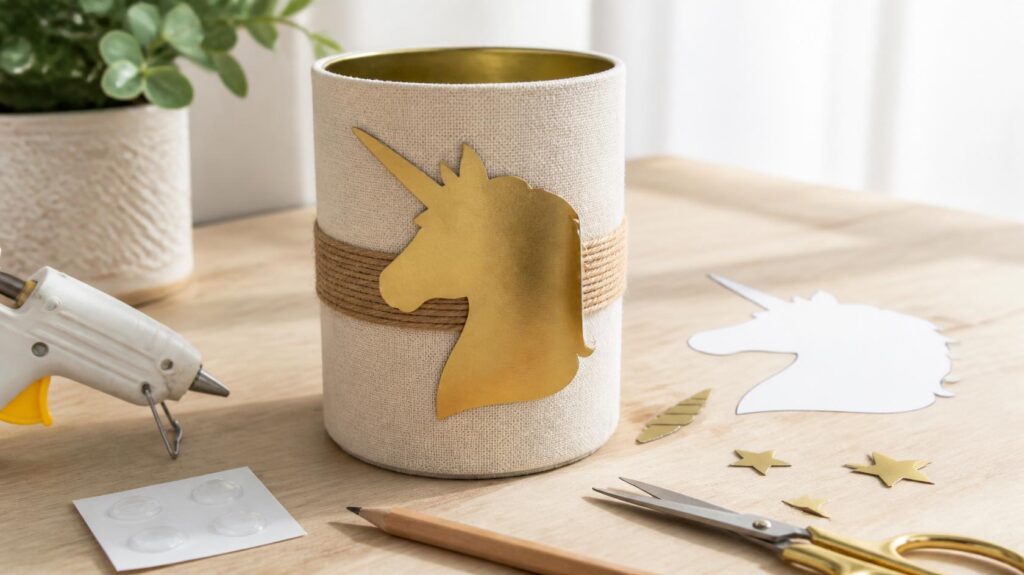
Step 4: Arrange the Flowers
Place floral foam inside the container if the flowers need additional support. Begin with the tallest stems in the center or toward the back.
Add shorter flowers around them to create a soft, layered arrangement. Use artificial flowers, dried flowers, or pampas-style stems in cream, blush, beige, dusty rose, and muted lavender.
Step 5: Add Natural Finishing Details
Wrap a piece of ribbon or jute twine around the container. Add a short strand of wooden beads for extra texture.
Avoid adding too many small decorations. The combination of soft flowers, natural materials, and one gold unicorn accent should be enough to make the centerpiece feel complete.
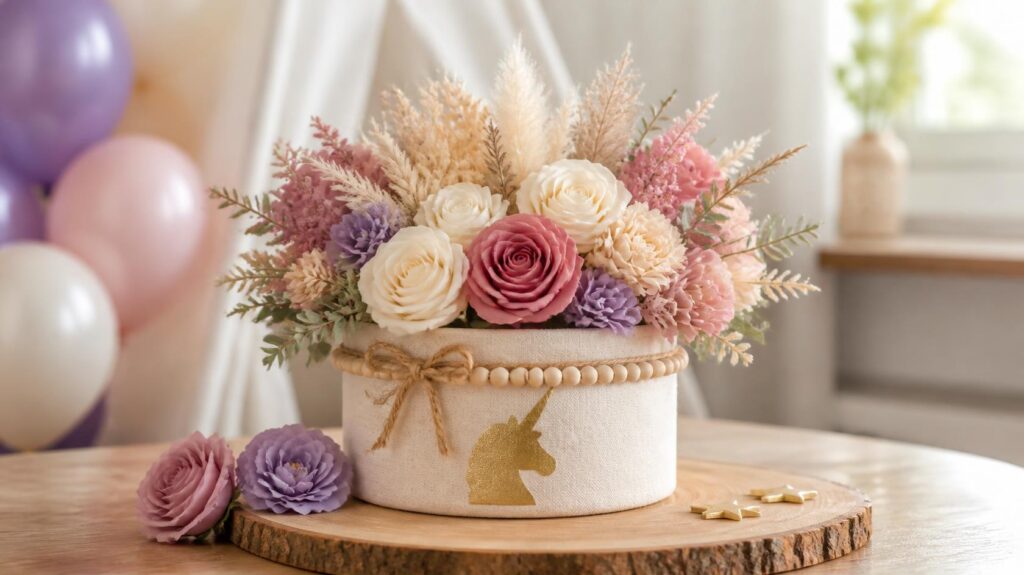
Step 6: Create the Centerpiece Base
Place the finished arrangement on a small wooden slice, neutral tray, or simple placemat. This gives the centerpiece a defined area and helps it look more substantial on the table.
You can add a small unicorn figure, a few loose flowers, or two gold stars beside the container.
Step 7: Check the Height
Set the centerpiece on the party table and sit in one of the chairs to ensure height. Children should be able to see one another, reach their food, and move comfortably without disturbing the arrangement.
If the centerpiece blocks the view across the table, shorten the flower stems or move the tallest pieces toward the back.
Ways to Style Your Boho Unicorn Centerpiece
Add a small table number to the wooden base to turn the centerpiece into a functional table marker.
For a more recognizable unicorn design, place a small unicorn figurine beside the flower arrangement. Choose a simple white, cream, or gold figure that coordinates with the softer palette.
You can also make smaller matching arrangements for the food table, welcome table, gift area, or favor station. Repeating the same flowers and materials throughout the room will help the party feel coordinated.
If you prefer a brighter centerpiece or want to create the flowers entirely from paper, see How to Make a Unicorn Tissue Paper Flower Centerpiece on a Budget for another affordable option.
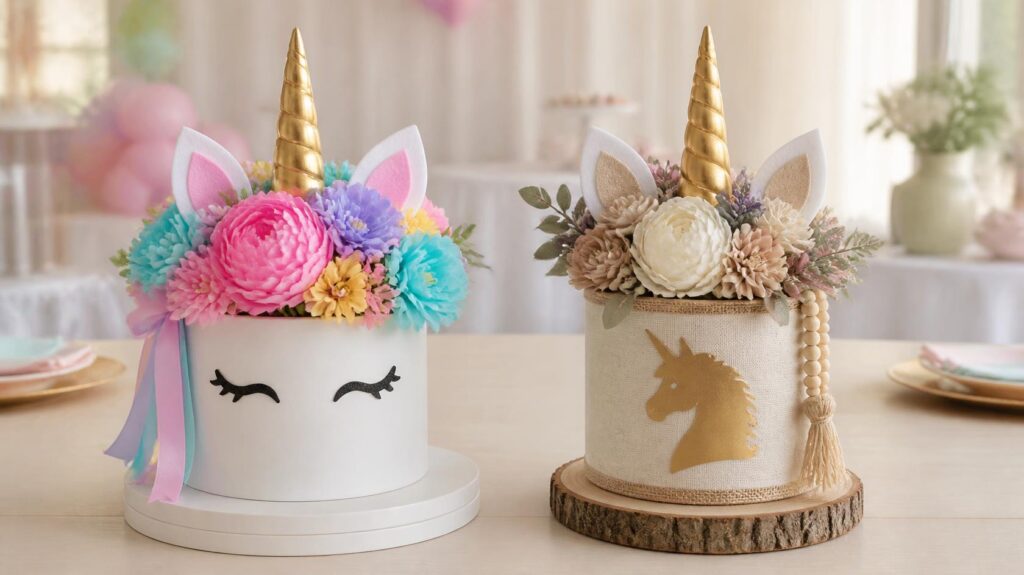
Quick Styling Tip
Use one main neutral color, two muted accent colors and a small amount of gold. Repeating this palette throughout the table will create a finished look without making the centerpiece feel overly decorated.
Recreate This Boho Unicorn Centerpiece
A few carefully chosen supplies can help you recreate this soft, modern centerpiece without needing to purchase a completely assembled decoration.
1. Mini Artificial Flower Bundles

Add soft color, and it can be reused for other party displays or home décor.
2. Wooden Beads

Bring natural texture to the arrangement and coordinate well with jute, dried flowers, and wooden display pieces.
3. Gold Craft Paint

Use it to finish the unicorn silhouette, horn, stars, or small decorative accents.
4. Unicorn Cake Toppers or Figurines
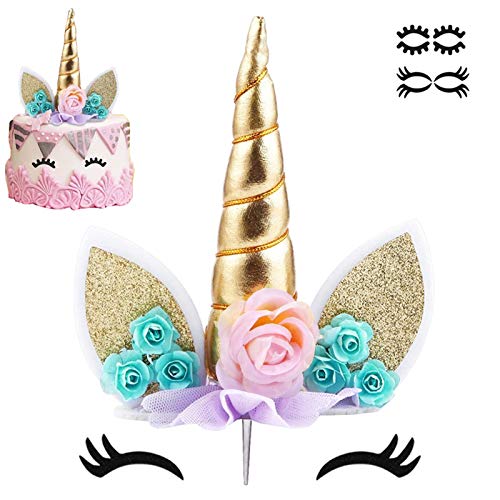
Place one beside the arrangement to make the unicorn theme more noticeable.
5. Small Wooden Display Slices

Create a defined base and give the centerpiece a warm, natural boho finish.
DIY Project 3: Eco-Friendly Rainbow and Cloud Decorations
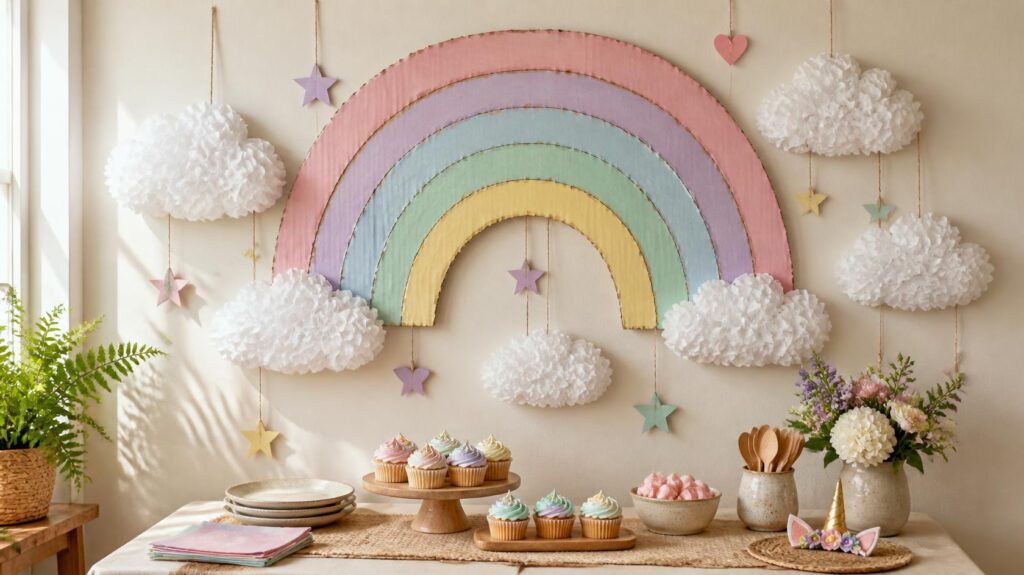
Shipping boxes, leftover paper, and other basic household materials can be turned into colorful unicorn party decorations instead of being thrown away. These lightweight rainbow-and-cloud decorations can be hung on walls, placed above party tables, or made into smaller signs for different areas of the celebration.
This project is especially helpful if you want to reduce disposable plastic while keeping the party colorful and child-friendly. You can customize the decorations with classic rainbow shades, soft unicorn pastels, or the colors used throughout the rest of your party.
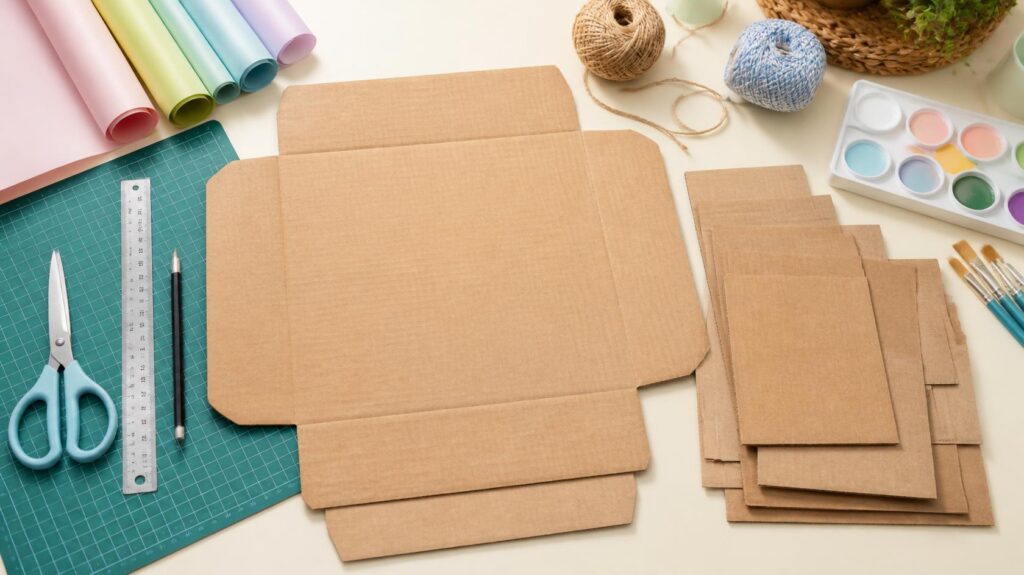
Materials You’ll Need
Before purchasing supplies: Look through your shipping boxes, gift-wrap collection and leftover craft materials. The goal is to reuse as much as possible while choosing clean materials that are sturdy enough to decorate.
How to Make Recycled Rainbow and Cloud Decorations
Step 1: Prepare the Cardboard
Choose clean, flat pieces of cardboard from shipping boxes. Remove tape, labels, staples, and damaged areas.
If the cardboard is bent, place it under a few heavy books overnight to help flatten it before tracing your shapes.
Step 2: Draw the Rainbow and Clouds
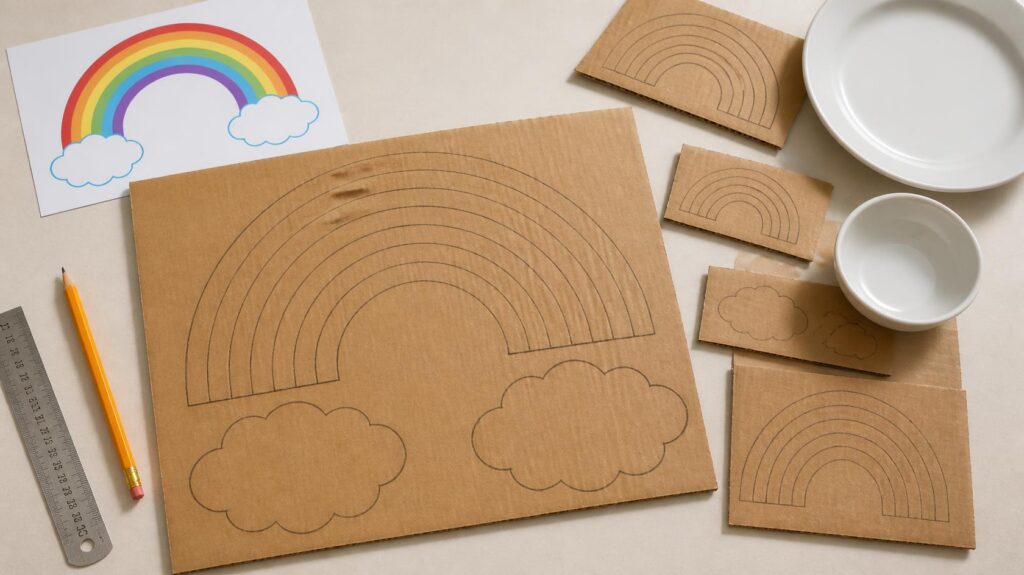
Use a pencil to draw a large rainbow arch and several cloud shapes directly onto the cardboard. You can trace printable templates or use plates and bowls as guides for creating smooth curves.
Make one large rainbow for the main display and several smaller shapes for signs, tables, or party stations.
Step 3: Cut Out the Shapes
Carefully cut along the traced lines using craft scissors or a craft knife. An adult should complete this step, especially when working with thick cardboard.
Trim any rough edges so the finished decorations look neat.
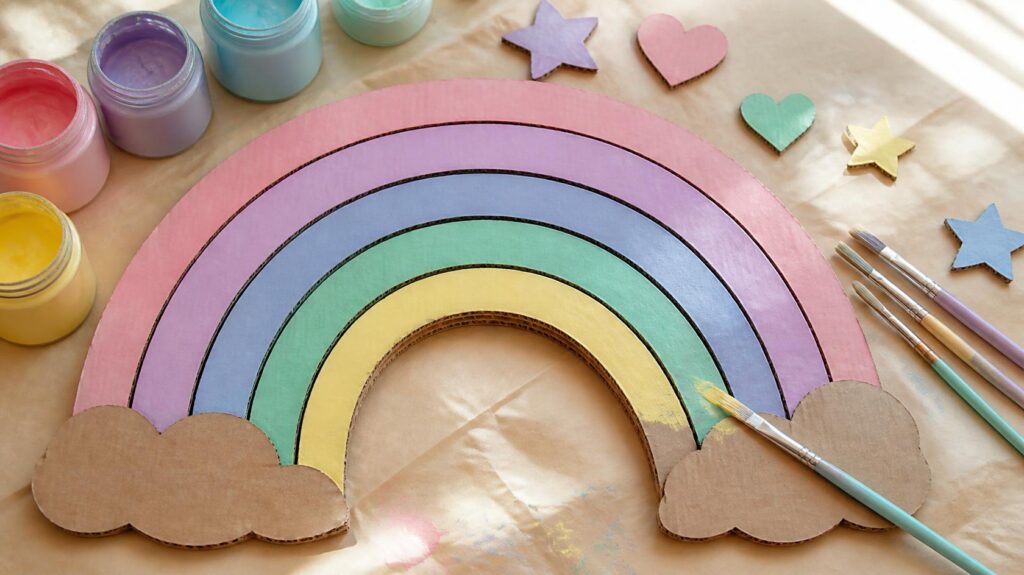
Step 4: Add the Rainbow Colors
Paint each section with non-toxic craft paint or cover the arches with leftover wrapping paper or cardstock.
For a classic unicorn rainbow, use pink, lavender, aqua, mint, and yellow. For a boho version, choose cream, blush, dusty rose, muted lavender, and soft sage.
Allow painted pieces to dry completely before adding the remaining details.
Step 5: Assemble the Clouds
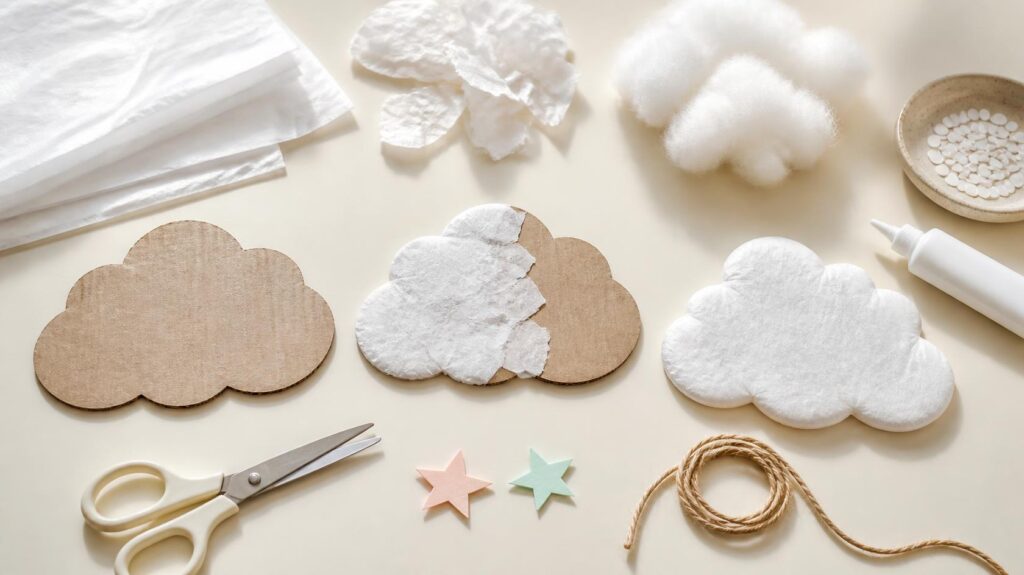
Cover the cardboard clouds with white tissue paper, clean crumpled scrap paper, or a thin layer of cotton batting.
If you use cotton batting, apply only enough to create a soft texture. Large amounts can make the decoration bulky and more difficult to hang.
Step 6: Add the Finishing Details
Decorate the rainbow and clouds with paper stars, small hearts, or a light dusting of biodegradable glitter.
Use glitter sparingly. A few carefully placed accents will create sparkle without covering the entire project or making cleanup difficult.
Step 7: Attach the Hanging String
Create two small holes near the top of each decoration and thread paper twine or natural string through them.
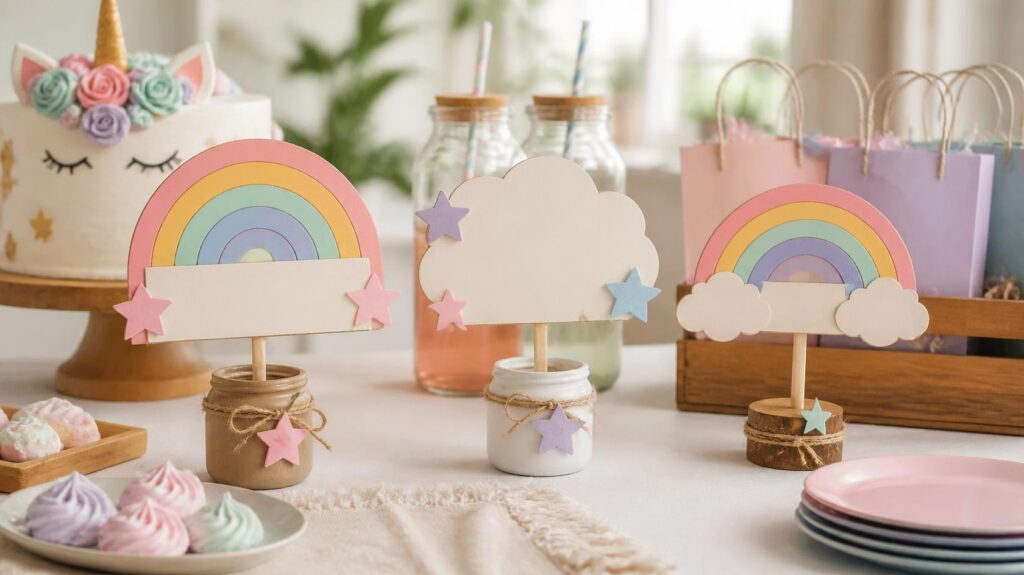
Make sure the string is balanced so the decoration hangs evenly. You can also attach smaller pieces to wooden dowels to create lightweight table signs.
Step 8: Place the Decorations Around the Party
Hang the largest rainbow over the dessert table or use it as part of a wall display. Place smaller clouds and stars around it to fill the surrounding space.
Use additional pieces to identify the food table, gift area, activity station, or favor table.
Ways to Use Your Finished Decorations
Eco-Friendly Decorating Tip
Reuse clean cardboard from deliveries and work with paper or craft supplies you already have before purchasing anything new. Use natural string instead of plastic ribbon when possible, and choose biodegradable glitter for small sparkling details.
After the party, save sturdy decorations for another celebration or use them in the child’s bedroom or playroom. Clean, undecorated paper scraps can be recycled according to your local recycling guidelines.
Recreate These Rainbow and Cloud Decorations
These basic craft supplies can help you complete the project while keeping it colorful, approachable, and suitable for children’s party décor.
1. Non-Toxic Craft Paint

Add color to the rainbow sections without covering them in new paper.
2. Natural Paper Twine
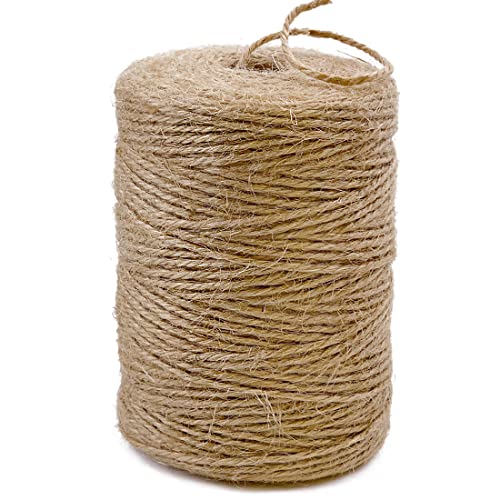
Hang the finished decorations or attach small versions to party signs.
3. Biodegradable Glitter

Add a limited amount of sparkle without using traditional plastic glitter.
4. Child-Safe Paintbrush Set

Make it easier for children to help paint larger rainbow sections with adult supervision.
5. Recycled Cardstock Pack

Create stars, hearts, rainbow layers, food labels, and other finishing details.

DIY Project 4: No-Sew Felt Unicorn Banner
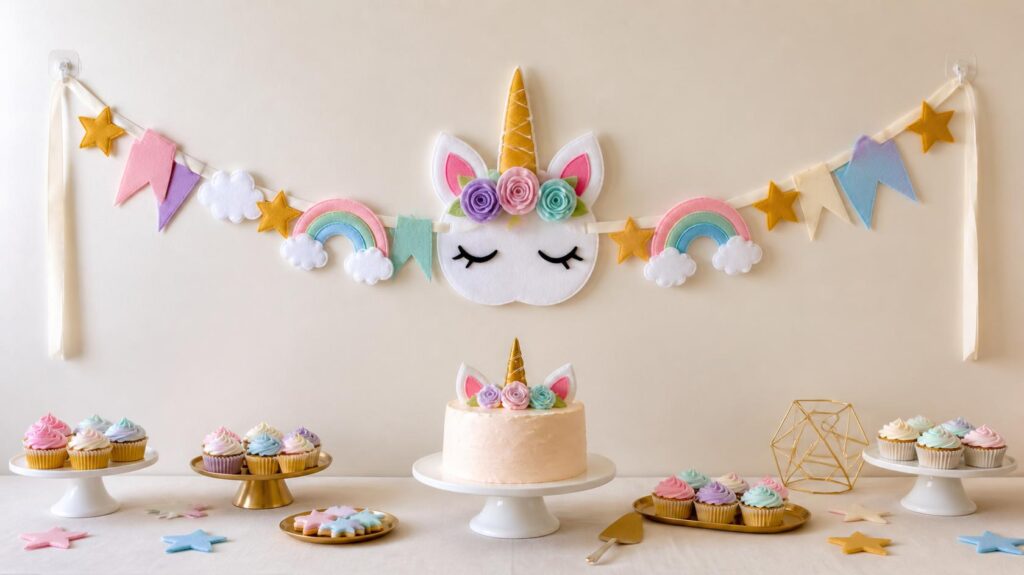
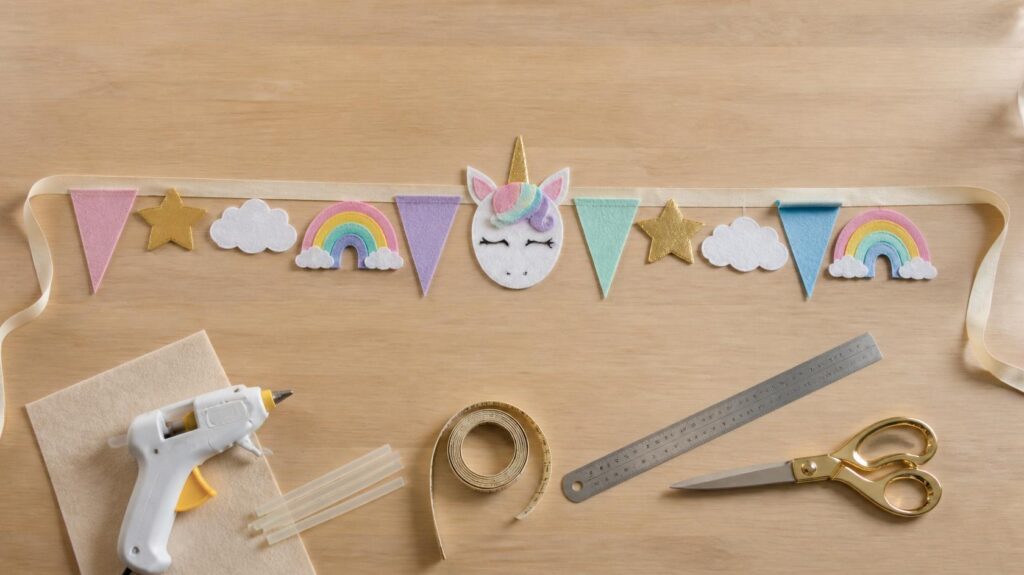
A felt unicorn banner adds soft color and handmade detail to a birthday party without requiring a sewing machine. Felt is easy to cut, does not fray around the edges, and can be layered with glue, making it a practical material for beginners.
This banner can be customized with unicorn faces, rainbows, clouds, stars, the birthday child’s name, or a combination of several designs. Once the party is over, carefully store it flat and reuse it as bedroom or playroom décor.
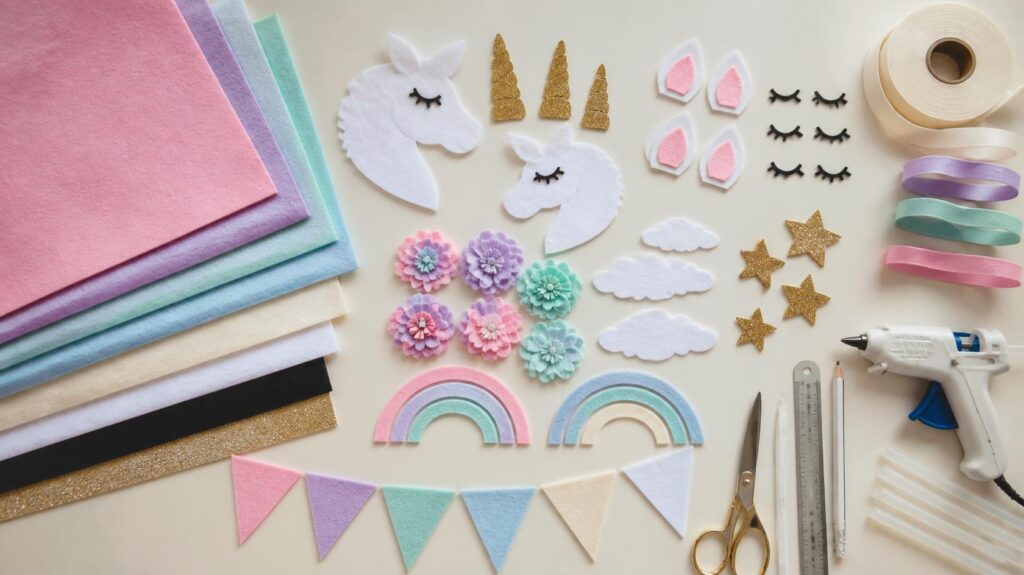
Materials You’ll Need
Choose your palette first: Select three main colors and one metallic accent before cutting the felt. A limited palette will help the individual banner pieces look like one coordinated decoration.
How to Make a No-Sew Unicorn Banner
Step 1: Choose the Banner Design
Decide whether you want the banner to feature unicorn heads, traditional pennant shapes, clouds, stars, rainbows, letters, or a mixture of designs.
Measure the area where the banner will hang before determining its final length. Leave extra ribbon at both ends, so you have enough room to secure it.
Step 2: Trace the Main Shapes
Place the unicorn head or banner templates on the felt and trace around them with a chalk pencil or fabric marker.
Turn the templates over when necessary to create mirrored ears or other matching pieces. Keep the traced lines close together to reduce wasted felt.
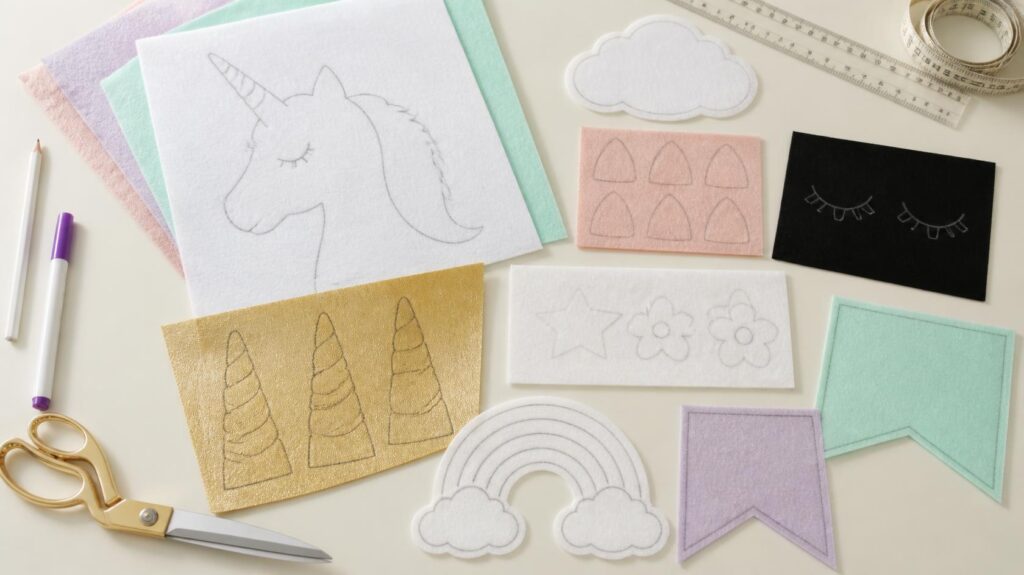
Step 3: Cut the Banner Pieces
Use sharp fabric scissors to cut along the traced lines. Cut enough large pieces to cover the desired length of the banner without making the arrangement feel crowded.
Lay the pieces in a row as you cut them so you can check the color pattern and spacing.
Step 4: Cut the Decorative Details
Cut smaller horns, inner ears, flowers, stars, eyelashes, clouds, or rainbow pieces from coordinating felt.
Use gold felt or glitter cardstock for the horns and small metallic accents. Black felt works well for simple closed eyelashes.
If the banner will include the birthday child’s name, trace and cut one felt letter at a time. Arrange the letters in order before gluing them down to avoid spelling mistakes.
Step 5: Build Each Design
Layer the smaller decorative pieces over the larger felt shapes. For a unicorn face, begin with the horn and ears, add the eyelashes, and finish with a small flower cluster around the base of the horn.
Arrange all the details before applying glue. This gives you time to adjust the spacing and make sure each piece looks balanced.
Step 6: Glue the Pieces Together
Use a low-temperature hot-glue gun to attach each layer. Apply small amounts of glue near the edges and center of each piece rather than covering the entire surface.
Press the layers together gently and allow them to cool before moving the finished designs.
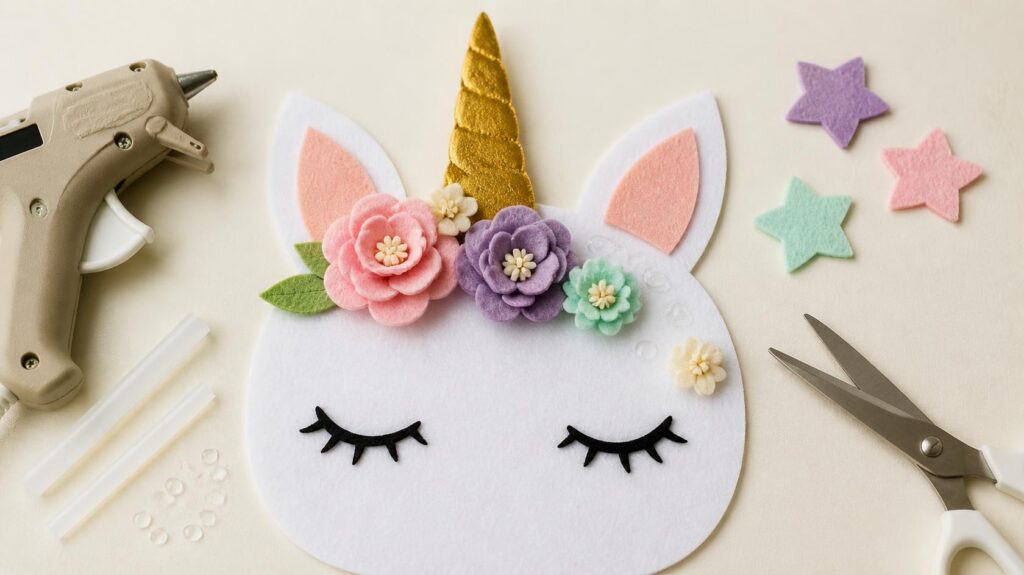
Step 7: Arrange the Banner
Lay the ribbon or fabric cord across a large table or clean floor. Position the finished pieces along the ribbon and adjust the spacing until the banner looks balanced.
Alternate colors and shapes to create a repeating pattern. Leave enough empty ribbon at each end for hanging.
Step 8: Attach the Pieces to the Ribbon
Glue the top of each felt piece directly to the ribbon. You can also fold the top edge of a pennant over the ribbon and glue it in place to create a cleaner finish.
Check that each piece faces forward and hangs at the same height before the glue sets.
Step 9: Let the Banner Dry
Allow the completed banner to lie flat until the glue has cooled and dried completely. Lift it carefully and check each attachment before hanging it.
Use removable wall hooks to display the banner over the cake table, dessert station, gift area, party entrance, or photo backdrop.
No-Sew Unicorn Banner Ideas
Quick Crafting Tip
Lay the entire banner out before gluing anything to the ribbon. Seeing the complete arrangement makes it easier to correct uneven spacing, repeated colors or misplaced letters before the pieces are permanently attached.
A Quick Safety Reminder
An adult should handle the hot-glue gun and sharp fabric scissors. Use a low-temperature glue gun when possible, protect the work surface, and allow every glued piece to cool completely before children touch the banner.
Keep small felt flowers, stars, beads, ribbon pieces, and other decorative accents away from toddlers unless they are closely supervised.
Recreate This No-Sew Unicorn Banner
These supplies will help you create a reusable banner with clean edges, secure layers, and a coordinated finish.
1. Pastel Felt Bundle

Provides coordinating colors for unicorn heads, pennants, clouds, rainbows, flowers, and stars.
2. Low-Temperature Glue Gun
Secures the felt layers and attaches the finished pieces to the ribbon without requiring sewing.
2. Gold Felt

Creates unicorn horns, stars, lettering, and metallic accents without loose glitter.
3. Fabric Scissors

Produce cleaner edges when cutting felt, ribbon, and fabric cord.
4. Unicorn Cutting Templates

Keep the unicorn heads, horns, and ears consistent throughout the banner.
5. Pastel Ribbon Set

Adds coordinating hanging cord, bows, tassels, and finishing details.
DIY Project 5: Outdoor Unicorn Garden Decorations
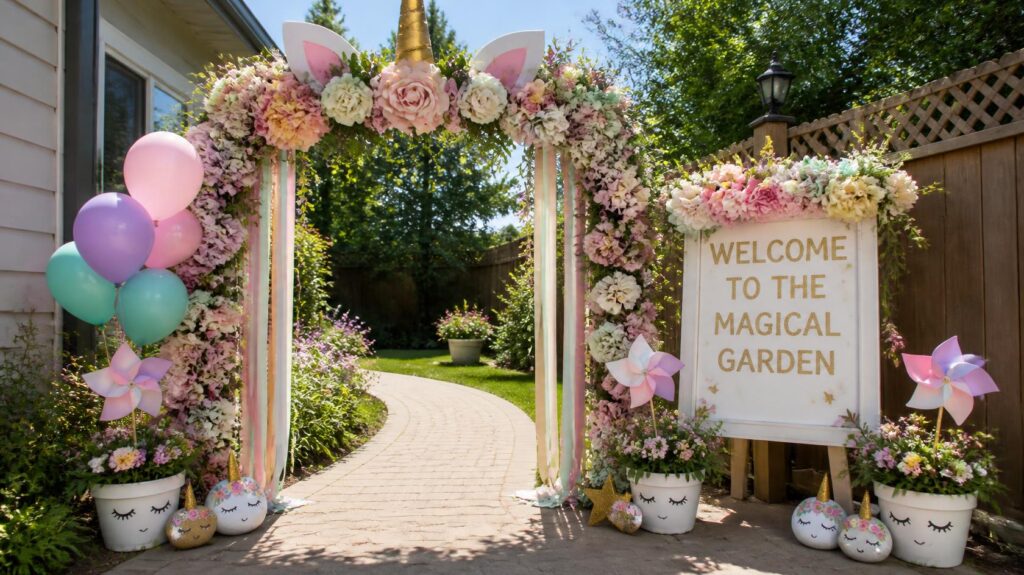
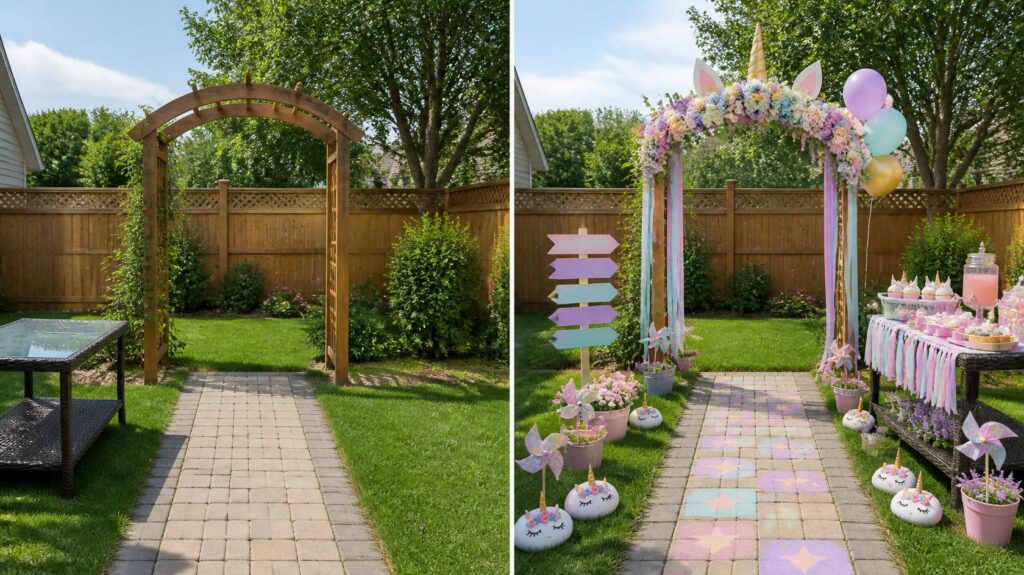
An outdoor unicorn party can begin before guests ever reach the main celebration area. Painted directional signs, decorated garden paths, unicorn rocks, flowers, and colorful pinwheels can guide guests through the yard while making the entire space feel like a magical garden.
These projects can be adapted for a backyard, patio, park pavilion, or outdoor venue. Because the decorations will be exposed to sunlight, wind, and possible moisture, choose sturdy materials and secure everything carefully.
Materials You’ll Need
Choose your color palette first: Select three main party colors and one metallic accent so the signs, rocks, flowers and pathway decorations look coordinated. Corrugated plastic will generally hold up better than regular foam board if moisture is expected.
How to Make Unicorn Directional Signs
Step 1: Choose the Sign Shapes
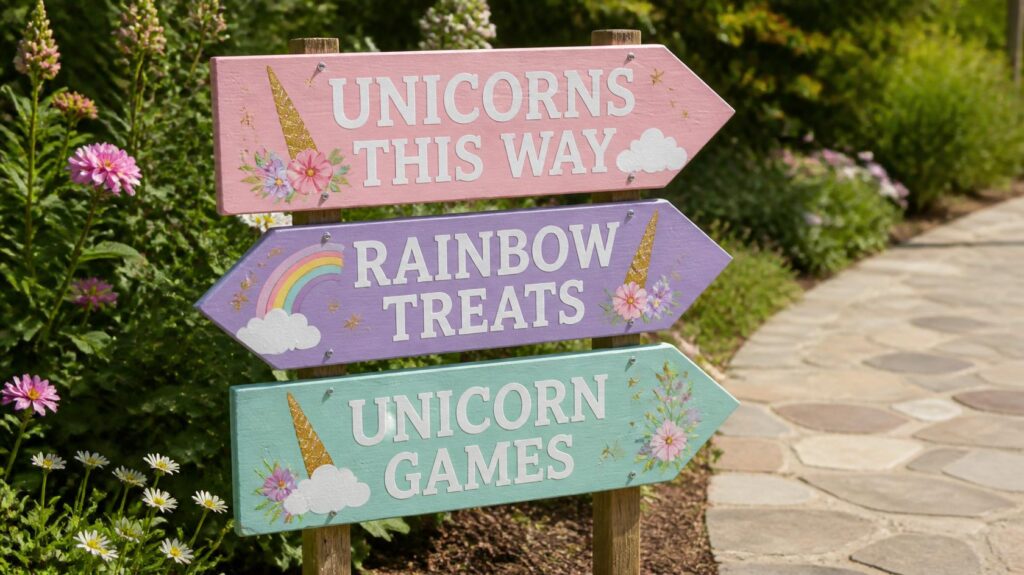
Draw cloud, star, rainbow, arrow, or simple rectangular sign shapes onto foam board or corrugated plastic.
Use a ruler to make the signs large enough to read from several feet away. An adult should cut the shapes with a craft knife or heavy-duty scissors.
Step 2: Paint the Background
Paint each sign in one of the selected party colors. Use white, blush pink, lavender, mint, powder blue, or another color that coordinates with the celebration.
Apply a second coat if necessary and allow the paint to dry completely.
Step 3: Add the Wording
Use letter stencils, printable wording, or carefully drawn letters to add a short message to each sign.
Possible Phrases Include:
Keep the wording short and use dark or metallic lettering that is easy to read against the background.
Step 4: Add Decorative Details
Decorate the signs with small horns, ears, eyelashes, stars, flowers, clouds, or rainbows.
Leave enough open space around the wording so the signs remain easy to read. A few larger accents will usually look better than many small decorations.
Step 5: Seal the Signs
Apply a clear weather-resistant sealer if the signs may be exposed to light moisture. Follow the product instructions and allow the sealer to dry in a well-ventilated area.
Sealer can provide some protection, but it will not make ordinary paper or foam board completely waterproof. Bring the signs indoors during heavy rain.
Step 6: Attach the Wooden Stakes
Secure each sign to a wooden stake using outdoor adhesive, waterproof tape, or another method suitable for the materials.
Check the back of each sign before placing it outdoors. The sign should not slide, tilt, or detach when moved.
Step 7: Place the Signs
Position directional signs along the walkway, near the entrance, or beside different party stations.
Push stakes into firm soil and keep them away from areas where children will be running. Do not place stakes near steps, narrow walkways, or other locations where they could become a tripping hazard.
How to Make Painted Unicorn Rocks
Step 1: Prepare the Rocks
Choose smooth rocks with flat surfaces. Wash them thoroughly to remove dirt and allow them to dry completely.
Step 2: Add the Base Color
Paint each rock white or use a selection of pastel colors. Apply additional coats as needed, allowing each coat to dry before continuing.
Step 3: Create the Unicorn Details
Add simple closed eyelashes, small gold horns, stars, hearts, rainbows, flowers, or the names of party guests.
Use a fine paintbrush or paint marker for smaller details. Keep the designs simple so they remain easy to recognize.
Step 4: Seal the Finished Rocks
After the paint dries, apply an outdoor-safe clear sealer according to the manufacturer’s directions.
Complete this step in a well-ventilated area and allow the rocks to dry completely before children handle them.
Step 5: Decorate the Party Area
Use the rocks to line a garden path, decorate tables, mark activity stations, or add color around flowerpots.
Step 6: Turn Them Into Party Favors
If appropriate for the age of the guests, allow each child to choose a painted unicorn rock to take home. Place the rocks in small paper bags so the sealed surfaces do not scratch other favorite items.

More Outdoor Unicorn Garden Ideas
Quick Outdoor Decorating Tip
Walk through the yard from a guest’s point of view before the party begins. Make sure the signs are easy to read, decorations are securely attached, and pathways remain open and safe.
Check the weather forecast and create a quick plan for moving lightweight or moisture-sensitive decorations indoors if conditions change.
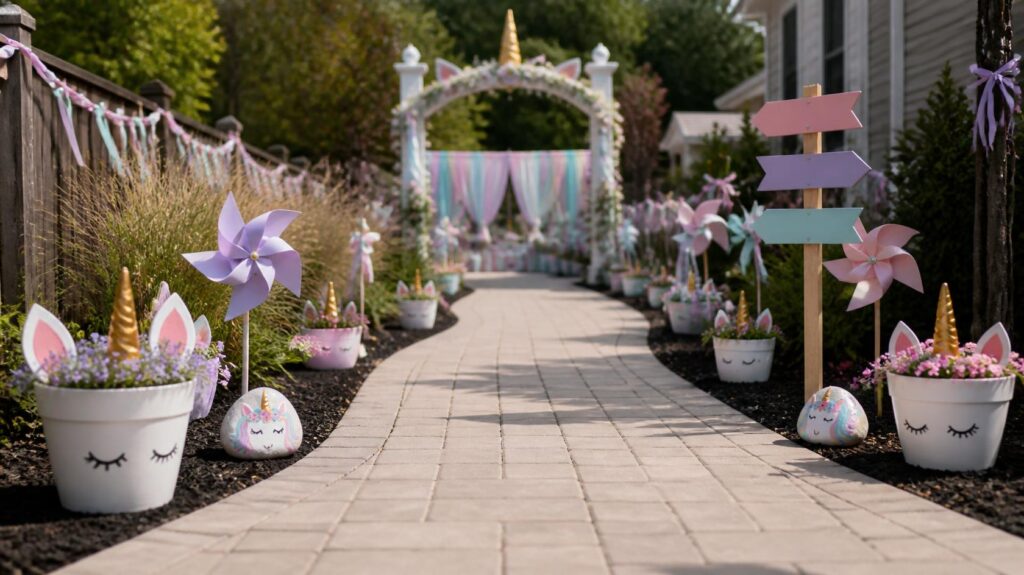
Recreate This Outdoor Unicorn Garden
Choose outdoor-friendly supplies that will help the decorations remain colorful, secure, and attractive throughout the celebration.
1. Outdoor-Safe Craft Paint

Adds color to signs, rocks, wooden stakes, and other garden accents.
2. Clear Waterproof Sealer

Helps protect painted surfaces from light moisture and outdoor exposure.
3. Wooden Sign Stakes

Display directional signs along walkways and near party stations.
4. Artificial Flower Garland
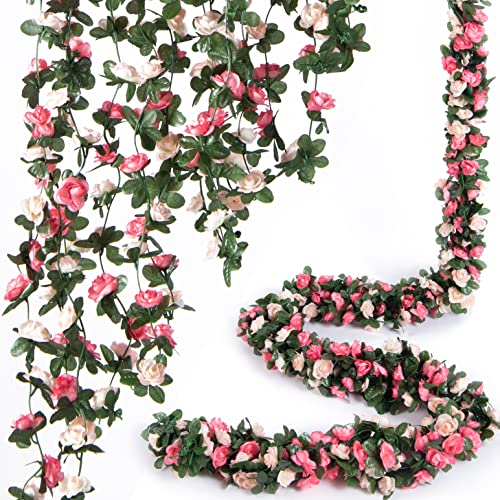
Decorates garden arches, fences, shrubs, railings, and outdoor tables.
5. Pastel Pinwheels

Add movement and color to pathways, flowerpots, and party entrances.
6. Outdoor Balloon Clips

Help secure small balloon clusters to suitable, properly anchored outdoor structures.
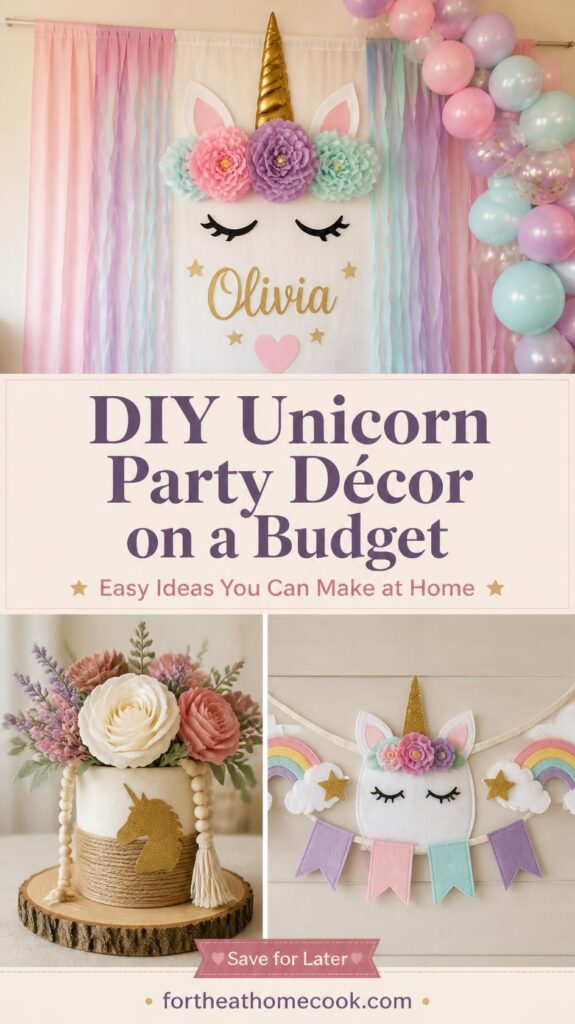
How to Make Inexpensive Unicorn Décor Look Professional
The difference between a scattered collection of party supplies and a polished unicorn party usually comes down to coordination and placement, not the amount of money spent.
Affordable decorations can look intentional when the colors, shapes, and materials work together. Before decorating, decide where you want guests to look first and build the rest of the room around that area.
Choose a Simple Color Palette
Choose three main colors and one metallic accent before purchasing or making decorations. For example, you could combine blush pink, lavender, mint, and metallic gold.
Limiting the palette makes it easier to combine supplies from different stores without the finished party looking mismatched.
Repeat the Colors Throughout the Party
Use the same colors on the backdrop, tables, signs, centerpieces, banners, and favor station. Every area does not need to include all four colors, but each color should appear more than once.
This repetition connects the individual decorations and helps the entire party feel coordinated.
Create One Large Focal Point
Instead of scattering small decorations across every available surface, concentrate your biggest decorating effort in one main area.
The cake table, party backdrop, main entrance, or photo area can become the focal point. Once that area is complete, use smaller coordinating decorations throughout the remaining space.
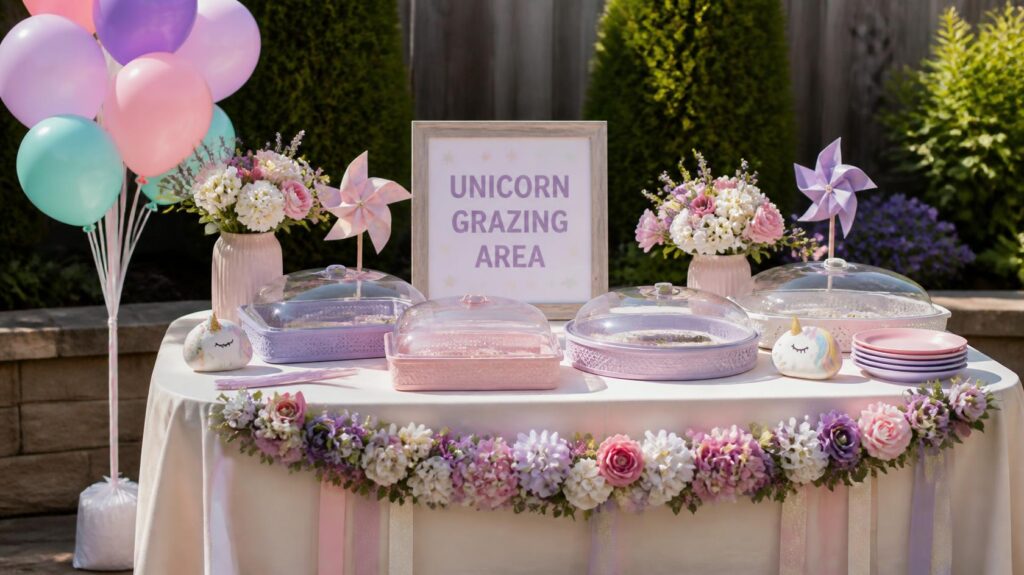
Arrange Decorations in Groups of Three
Group flowers, balloons, signs, jars, or other decorative pieces in sets of three. Use three different sizes or heights to keep the arrangement interesting.
For example, place one centerpiece beside two smaller flower arrangements or group one large balloon with two smaller balloons.
Add Different Heights to the Tables
A table can look flat when everything sits at the same level. Use cake stands, wooden slices, small boxes, trays, or sturdy risers to create different heights.
Keep taller pieces toward the back and shorter decorations near the front. Make sure guest-table centerpieces remain low enough for children to see across the table.
Hide the Construction Details
Take a few minutes to conceal tape, glue, balloon strips, hooks, unfinished cardboard edges, and visible seams.
Place attachment points behind flowers, balloons, ribbon, signs, or other decorative accents. Small finishing details can make an inexpensive project look much more polished.
Repeat the Same Unicorn Details
Use the same horn shape, ears, eyelashes, stars, flowers, or rainbow design throughout the party.
Repeating these elements on the backdrop, banner, signs, centerpieces, and favor table creates a recognizable design style and makes everything look like part of one collection.
Use Solid-Colored Table Coverings
Place decorative pieces on white, cream, or solid pastel table coverings. A simple background helps the decorations stand out and keeps the table from looking too busy.
If the decorations already include several patterns and colors, avoid adding a heavily patterned tablecloth underneath them.
Leave Some Open Space
You do not need to cover every wall, table, or corner. Leaving open space around the main decorations helps guests notice the details and prevents the party from feeling cluttered.
When a display begins to look crowded, remove one or two smaller pieces and check it again.
Check the Setup Through Your Camera
Take several pictures of the finished setup before the party begins. Look at the images as if you were viewing the party for the first time.
Photographs can reveal uneven balloons, empty spaces, crooked signs, visible tape, or decorations that appear off-center. Make your adjustments while you still have time.
Quick Tip
Focus your biggest decorating effort on the area guests will see and photograph the most. This is usually the dessert table, party backdrop or main entrance.
Sample $50 Unicorn Decorating Budget
Creating several unicorn decorations does not require a large party budget. By choosing affordable materials, reusing supplies from home, and concentrating on a few high-impact projects, you can decorate the main party areas without purchasing a complete collection of ready-made décor.
The amounts below are flexible examples rather than guaranteed store prices. Your actual costs will depend on local prices, the size of your party space, and the materials you already own.
Sample $50 Unicorn Decorating Budget
| Category | Sample Budget |
|---|---|
| Backdrop materials | $12 |
| Balloons and balloon strip | $10 |
| Centerpiece supplies | $8 |
| Felt banner materials | $8 |
| Cardboard rainbow and cloud supplies | $5 |
| Outdoor signs and painted rocks | $7 |
| Estimated Total | $50 |
This is a flexible planning example. Actual prices may vary by store, location, availability, and the supplies you already have at home.
The largest portion of the budget should be spent on areas guests will notice and photograph the most. This will usually be the cake table, party backdrop, or main entrance.
The remaining decorations can be smaller and placed around the party to repeat the same colors and unicorn details. You do not need a major installation in every part of the room.
Before shopping, check your home for cardboard boxes, jars, vases, ribbon, tissue paper, leftover cardstock, artificial flowers, paint, scissors, and glue. Using materials you already have can reduce the total cost and leave more room in the budget for balloons, food, favors, or another party priority.
Short on Time? Consider Ready-Made Décor
DIY decorations give you more control over the colors, wording, size, and overall look of your unicorn party. However, you do not have to make every decoration yourself for the celebration to feel personal and coordinated.
If your schedule is limited, purchase a large decoration, then complete a smaller project at home. The backdrop and banner are good items to buy because they usually require more cutting, measuring, assembly, and hanging than smaller table decorations.
You could purchase a finished unicorn backdrop and make the table centerpieces, painted rocks, or party signs yourself. Another option is to buy a ready-made banner and concentrate your time on creating the backdrop or outdoor garden decorations.
This gives you the handmade feel you want without adding too many projects to your party-planning schedule. It can also help you avoid purchasing tools or extra materials that you may not use again.
Before choosing a ready-made decoration, check the measurements, colors, included pieces, assembly requirements, and estimated delivery date. Product photos can make an item appear larger than it is, so compare the listed dimensions with the space where you plan to display it.
1. Ready-Made Unicorn Backdrop
A finished unicorn backdrop gives you an immediate focal point for the cake table or photo area. Look for colors that coordinate with your tableware, balloons, flowers, and other decorations.

Create a finished cake table or photo area without building the entire backdrop yourself. Check the dimensions, material, hanging method, and included pieces before placing an order.
2. Ready-Made Unicorn Birthday Banner
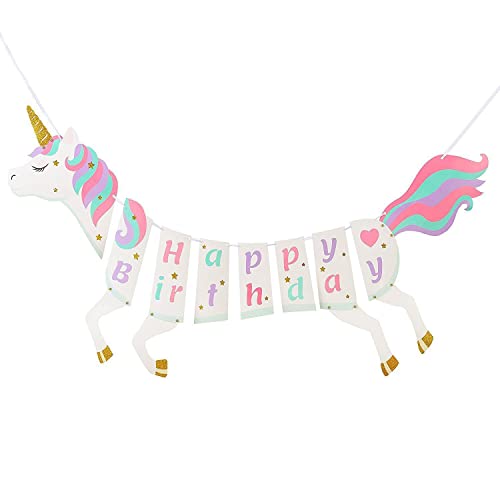
A ready-made banner can complete the cake table, party entrance, gift area, or photo backdrop without requiring felt cutting, letter tracing, or hot-glue assembly.
Add a coordinated unicorn detail without cutting and assembling individual banner pieces. Choose wording and colors that complement the rest of your party decorations.
Quick Planning Tip
Choose the ready-made item that would take you the longest to create. Then use your available crafting time for one or two smaller DIY projects that will make the party feel personal.
FAQs
Frequently Asked Questions
How far in advance can I make unicorn party decorations?
Felt banners, cardboard rainbows, painted rocks, signs and sealed outdoor decorations can usually be made several weeks before the party. Store them flat in a clean, dry place to prevent bending, fading or dust buildup.
Tissue-paper flowers can also be prepared early, but they should be stored in a large container so they are not crushed. Inflate balloons one or two days before the party, depending on the type of balloon and how long it is expected to hold its shape. Fresh flowers and food-table decorations should wait until closer to the celebration.
What colors work best for a unicorn birthday party?
Classic unicorn parties often use pastel pink, lavender, mint, powder blue and metallic gold. A brighter celebration can include bold rainbow colors such as pink, purple, blue, green and yellow.
For a softer boho unicorn party, try cream, beige, blush, dusty rose, muted lavender and small gold accents. The best palette is one that reflects the birthday child’s favorite colors. Choose three main colors and one accent to keep the finished party coordinated.
How can I decorate for a unicorn party without balloons?
Create visual impact with tissue-paper flowers, felt banners, cardboard rainbows, fluffy paper clouds, directional signs, fabric garlands, pastel pinwheels and artificial flower arrangements.
You can also decorate the cake table with unicorn centerpieces, paper stars, painted rocks and reusable fabric table coverings. Concentrate these pieces around one main focal point so the party still feels full and festive.
What is the easiest unicorn decoration for beginners?
Recycled cardboard rainbow-and-cloud decorations are one of the easiest options because they require only basic tracing, cutting, painting and gluing.
A simplified felt banner is another beginner-friendly project. Start with basic triangular pennants, one central unicorn face and a few stars instead of creating several detailed pieces.
How do I keep outdoor decorations from blowing away?
Attach signs securely to wooden stakes, push the stakes firmly into the soil and use outdoor adhesive or waterproof tape where appropriate. Place centerpieces inside weighted containers and anchor balloon clusters to sturdy, weighted supports.
Seal painted signs and rocks with a weather-resistant product, but remember that sealer does not make paper or foam board completely waterproof. Avoid placing lightweight, loose decorations outdoors when strong wind or rain is expected.
Can these unicorn decorations be reused?
Yes. Felt banners, painted rocks, neutral centerpiece containers, wooden signs, artificial flowers, display slices and backdrop stands can all be reused.
Store banners flat, wrap painted pieces to prevent scratches and keep paper decorations in a dry container. Some decorations can also be used in the birthday child’s bedroom or playroom after the party.
How do I decorate a small space for a unicorn party?
Focus most of the decorations around one backdrop and one party table. Use the backdrop as both the cake-table background and the photo area so one setup serves two purposes.
Choose a low centerpiece, hang a banner instead of using floor decorations and leave open space around walkways and seating. Repeating the same colors and unicorn details will make the room feel coordinated without filling every surface.
Is it cheaper to make or buy unicorn party decorations?
DIY decorations are usually most economical when you reuse cardboard, jars, ribbon, paper and tools that you already own. Making several decorations from the same pack of supplies can also help you get more value from each purchase.
If a project requires specialized tools or materials that you will not use again, purchasing a ready-made decoration may be more practical. Instead of comparing price alone, consider your available supplies, crafting time, desired customization and whether the finished item can be reused.
Create a Magical Unicorn Party Your Way
A magical unicorn birthday party does not require professionally designed decorations or an unlimited budget. With a coordinated color palette, a few affordable supplies, and thoughtful placement, handmade decorations can create a celebration that feels beautiful and personal.
Choose the ideas in this post that fit your available time, party location, crafting experience, and budget. Two or three well-placed decorations will usually have more impact than several unfinished projects scattered throughout the party.
A Simple Place to Start
One Focal-Point Decoration
Create a backdrop for the cake table, party entrance or photo area.
One Table Decoration
Add a boho unicorn centerpiece, painted rocks or a small rainbow-and-cloud display.
One Entrance or Directional Decoration
Welcome guests with a garden arch, unicorn sign, decorated pathway or outdoor party marker.
Once these three areas are covered, add smaller details only if you have the time and supplies. The goal is to create a coordinated unicorn celebration while leaving yourself enough time and energy to enjoy the party, too.

Ready for the Next Step?
Plan the Rest of Your Unicorn Party Without the Last-Minute Rush
Once you know which decorations you want to make, the next question is when to complete them—and when to order everything else.
The Stress-Free Unicorn Party Blueprint gives you a clear six-week timeline, ordering deadlines, printable checklists, progress trackers and a party-day schedule so you can work through the celebration one manageable step at a time.
See the Stress-Free Unicorn Party BlueprintPrintable digital product. Opens in a new window.
Related Posts
- Unicorn Birthday Party Ideas for Kids: Decorations, Food, Games & Planning Tips
- How to Make a Unicorn Tissue Paper Flower Centerpiece on a Budget
- 7 Unicorn-Themed Party Games for All Ages
- 15 Unicorn Party Favors Your Guests Will Adore
- Rainbow Unicorn Cupcakes Recipe for Your Party
- 5 Unique Unicorn-Themed Keepsakes
Leave a Reply